I’m open to incorporating AI (Artificial Intelligence) into my workflow, especially if it can save me time and still produce the same results. When I first discovered Imagen AI, I was certainly intrigued by what it promised and I decided to test it out and see if it’s as good as what I was hearing online – here’s my review after putting it through its paces over three months.
Editor’s note: This article is sponsored by Imagen AI. However, I’ve been using the software independently for several months and all opinions are my own. I only partner with tools I genuinely use and recommend.
Video
Although it uses complex code in the background, the frontend – the part the user experiences – is actually quite simple. Rather than having an abundance of features, Imagen lets you upload previously edited images and then analyzes and learns your unique photo editing style.
It then applies your style to future editing sessions, essentially serving as your fully trained photo editing assistant. The software also has culling capabilities, helping you narrow down large batches of images to just the very best. The culling tools are not powered in the same way, however, and you can’t train it to see images the way you do, like you can with the editing tools.
On the surface, all of that sounds great – but so does every photo editing software when they’re marketing their features. In this review I’m going to share how they actually worked in my real-world testing, share some final edits and tell you if the product is worth the asking price.
TL;DR
After testing Imagen AI for 90 days, I can honestly say it does speed up my overall photo editing process. It’s a shame it’s not a standalone app as I think this would really set it apart from similar tools. However, when we look at its assisted culling and AI photo editing capabilities that produce great results, it’s certainly worth incorporating it into your current workflow.
Imagen AI: Pros & Cons
Pros:
- Considerably speeds up workflows
- Very good photo culling results
- Like for like edits after training
- Excellent profiles in the marketplace
Cons:
- It isn’t a standalone app
- Training the AI can take time
- Not suitable for beginners
Training Your Imagen AI Profile
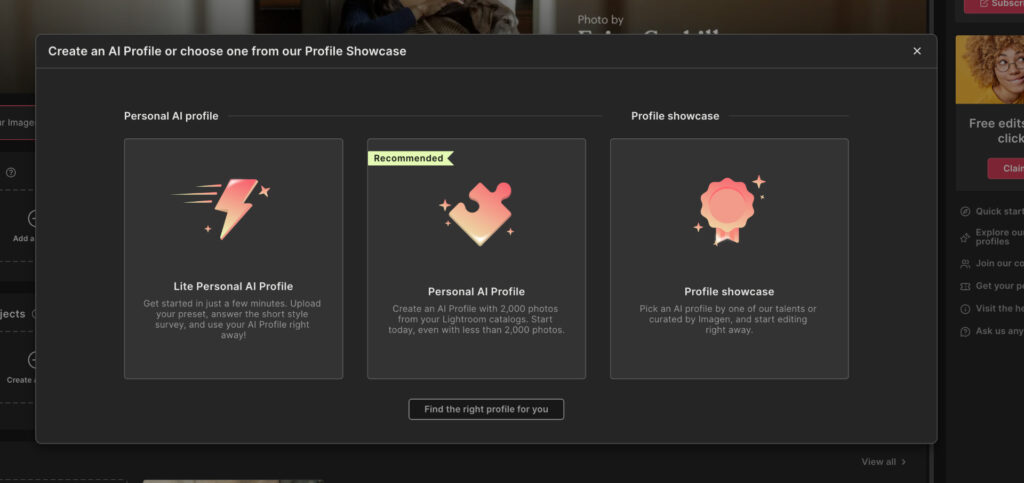
When opening a new project, you have three options: use an AI Lite Profile, use your trained AI Profile, or use an AI profile from the marketplace.
An AI Lite profile is essentially a preset, which you need to upload from Lightroom. Using this doesn’t really get the most out of the software, and it doesn’t offer enough to justify using Imagen over Lightroom or any other leading photo editing software.
Profiles from the marketplace go beyond standard preset bundles. You’re purchasing a trained profile from a professional photographer, which you can then use for your workflow. This is good if you really like the style of a specific photographer, and I found the standard of quality to be very high. However, it’s really best to carve out your own style in photo editing.
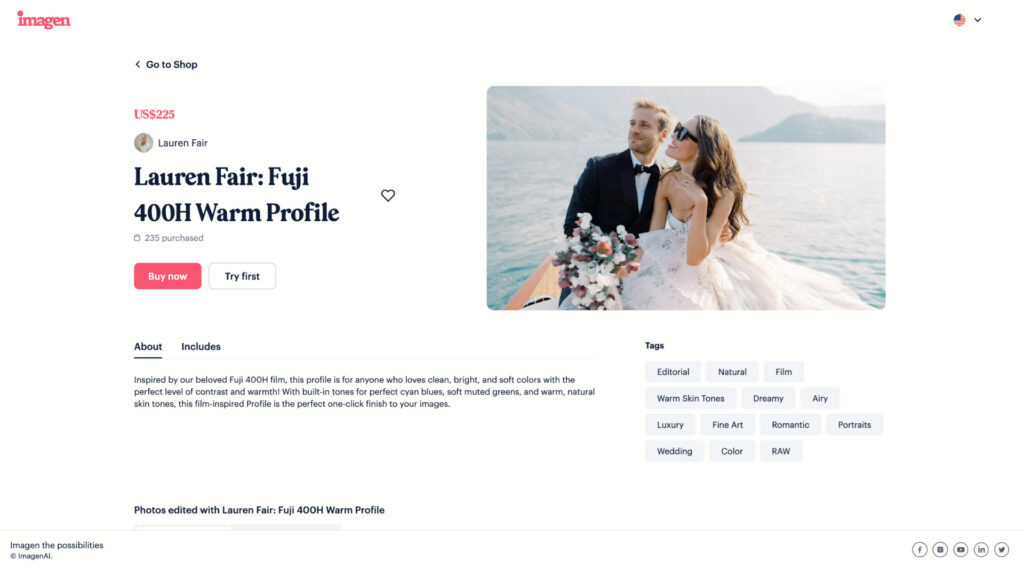
Imagen marketplace.
This is where the fully trained AI profile comes into play. By integrating Imagen into Lightroom Classic, you give it access to all your previous edits. You can also upload previously edited photos manually, however they must contain the .XMP files otherwise Imagen can’t process your style within its software.
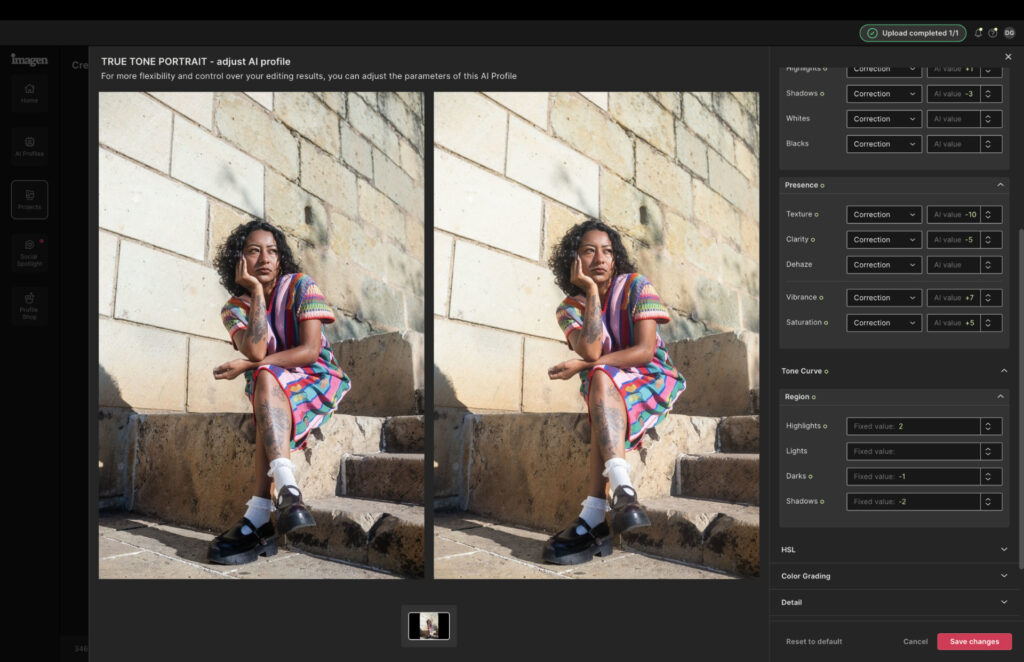
It differentiates from the standard Lite profile by offering dynamic editing. Rather than applying the same look to everything, it can analyze different lighting conditions, skin tones and environments, and make intelligent adjustments to ensure the applied edit is appropriate for each specific image, rather than a one size fits all approach.
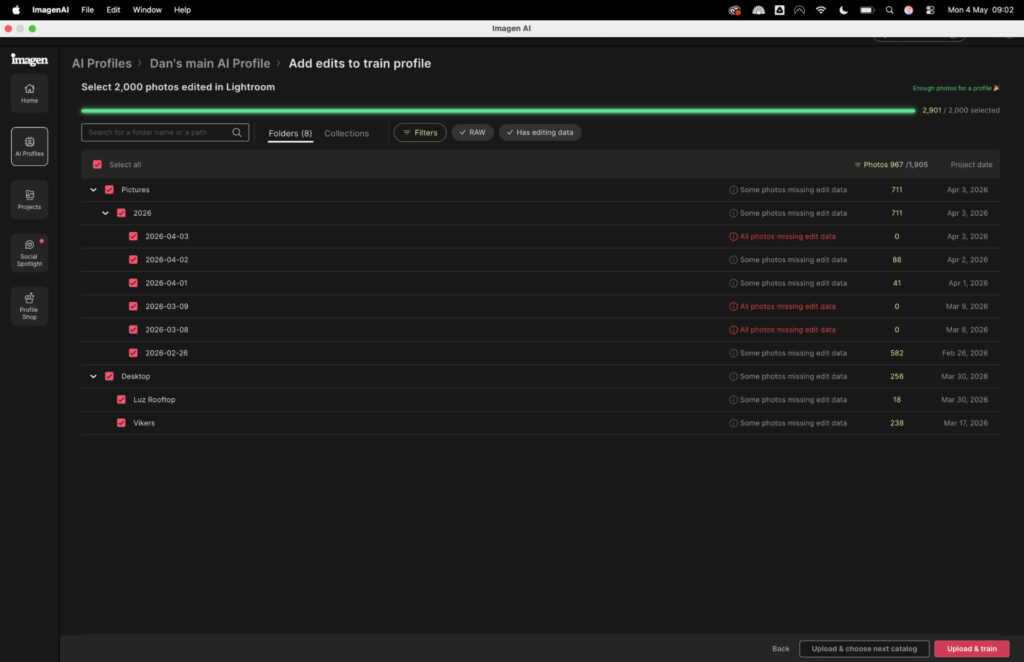
If you’re extremely organized, training your AI profile takes a handful of minutes. However, if you tend to export your JPEGs from Lightroom and remove the original files from the software, you’ll hit your first roadblock.
That’s because Imagen needs 2,000 images, ideally in different lighting conditions, to learn your style. Simply put, you’ll have to do more shoots in order to give the software what it needs to function to the best of its ability.
On initial set up, it can take Imagen up to 24 hours to train the AI.
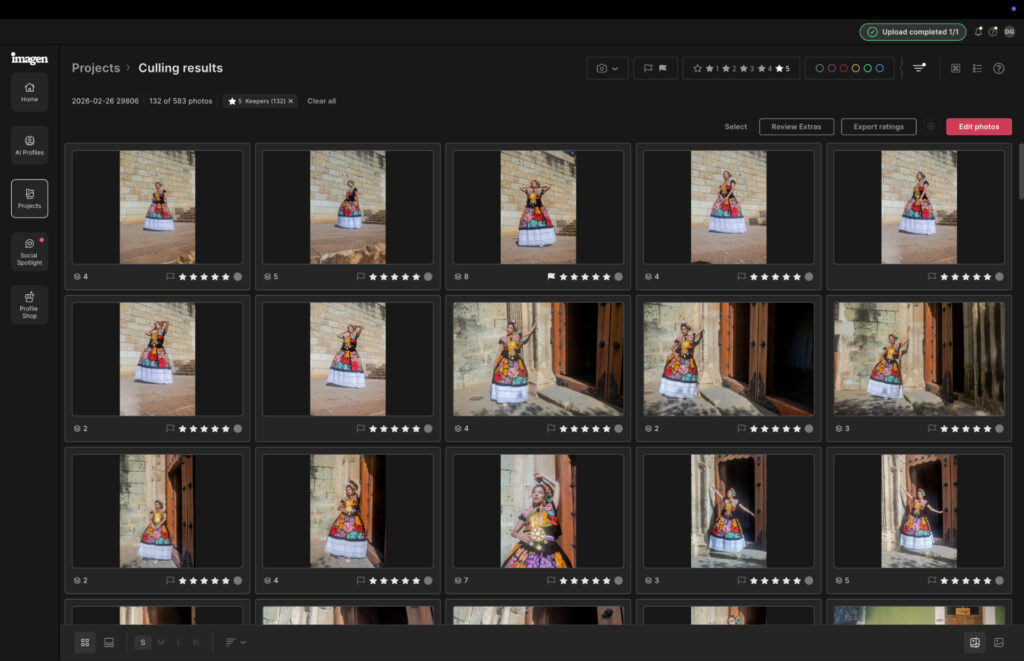
Using Assisted Culling Tools
The culling tools are there so you don’t have to spend time going through each image manually and deciding which are worth keeping. In all my testing, Imagen actually goes beyond the likes of Lightroom and Capture One in terms of its culling features.
Unlike the aforementioned software, Imagen lets you select the exact number of images you want to keep. For example, if you have 5,000 RAW files, you can narrow it down to 200 images ready for editing.

Imagen doesn’t delete the other images and you can review its selection to ensure you’re happy with the final output. In my opinion, assisted culling is tricky because often a non-technically sound image (soft focus, for example) isn’t necessarily a bad image, but there’s currently no way to communicate your personal tastes to photo editing software.
Once the culling is complete, Imagen ranks them either through color-coding or a starring system. A green tab or five stars indicate what it suggests are your very best shots from a shoot. It also flags images outside the defined culling range that are worth your consideration for editing.
In my testing, I manually culled the same shoot that I asked Imagen to cull. We were around 90% aligned on the final frames. In fact, it was more a case of Imagen keeping images I determined to be duds, rather than it removing shots I wanted to keep.
Considering the culling space as a whole, I don’t think we’re at a point where it can fully replace the human touch. Professional photographers certainly won’t want to hand their entire workflow over to software. At the time of writing I’d say it’s best used as a way to cut out the obvious rejects and save time compared to a fully manual workflow.
Related: I Tested The Best Photo Culling Software (A Clear Winner in 2026)
Ease of Use
Having tested countless photo editing applications over 10 years, I’ve become accustomed to a specific layout: tools in a right-hand menu, some extra tools in a top menu and the image I’m editing front and center of the screen.
Imagen AI doesn’t follow that same pattern and the UI (user interface) came with a bit of a culture shock when I first opened the software. The good news is that adjusting to its navigation doesn’t take much time, and there was plenty of guidance inside the software, plus through the knowledge base, to help me get to grips with how things work.
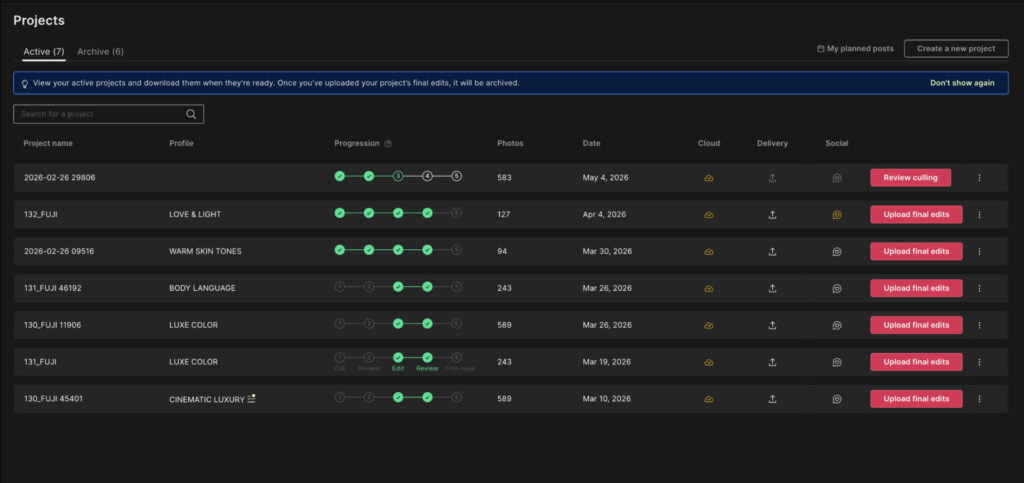
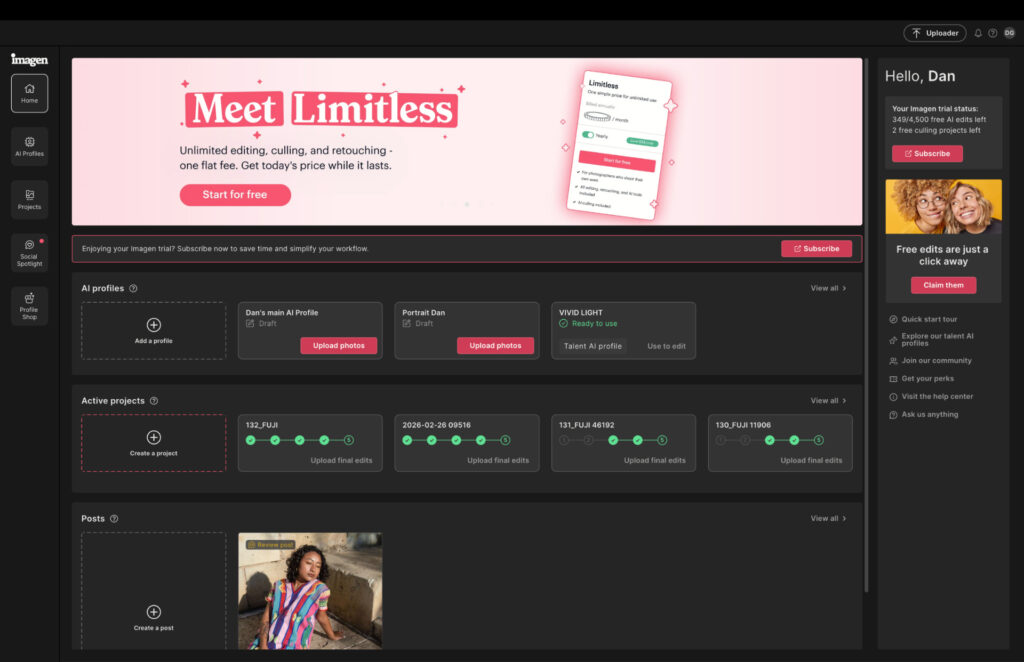
A concise view of all your editing projects.
Once I became familiar with the UI it actually became very easy to use. For photographers already working in Lightroom Classic, the integration is particularly smooth. It took just a handful of clicks to connect the two, and the two platforms felt immediately comfortable together, like a collaboration that had been running for years rather than something you’d just switched on.
Selecting which AI profile I wanted to use was straightforward thanks to clear labeling that sits at the top of the UI, and the terminology Imagen uses for its tools and features is self-explanatory throughout. You’re never left confused by an abstract description of what something does or how it works. For a tool with genuine complexity under the hood, it presents itself with a refreshing simplicity that makes it accessible without feeling dumbed down.
Real-World Performance
Talk is cheap in the world of photo editing software, so I decided to put Imagen to a proper test. I ran an identical batch of 243 portrait photographs, including minor masking tasks, through both Imagen and Lightroom and timed both processes. Imagen was done in 16 minutes. After two hours in Lightroom I still had a quarter of the batch left to work through.
That gap is significant, and it wasn’t a one-off. Across every project I’ve put through Imagen since, the result has been the same. A manual workflow simply cannot compete on speed.
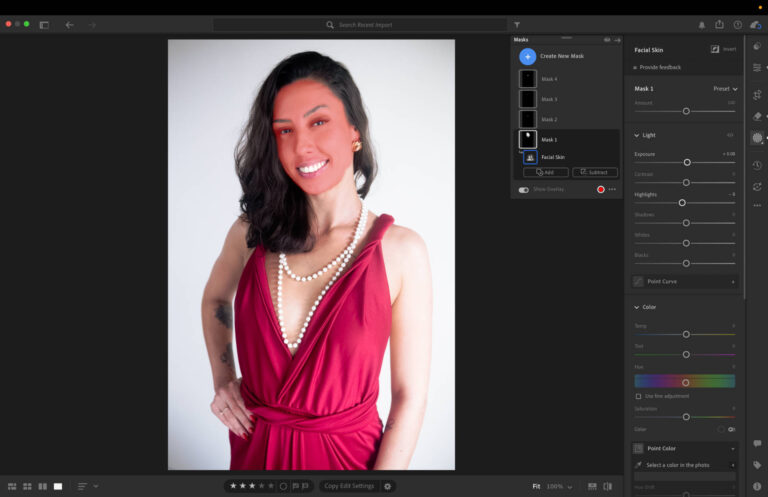
What surprised me more than the time saving was the quality. I expected to spend a chunk of time correcting Imagen’s output, but the edits landed almost exactly where I would have put them myself. Color grading, exposure, cropping all came back on point. Contrast needed a minor nudge, but that was it.
Orginal RAW File

Edited with Imagen AI

Before Imagen processes your images you can make your own adjustments to exposure, contrast, color grading and more, which gives you a useful layer of control. It’s not quite as smooth as it could be though. Instead of sliders you get up and down arrows, and you have to manually refresh after each change to see the result. It works, but it breaks the flow. Sliders and real-time updates feel like an obvious next step for the Imagen team.
On a different note, once your edits are complete you can post directly to Instagram from within the platform using the Social Spotlight tool. You can schedule posts and manage consistency without switching between apps, which is a genuinely handy addition for photographers who are also managing their own social presence.
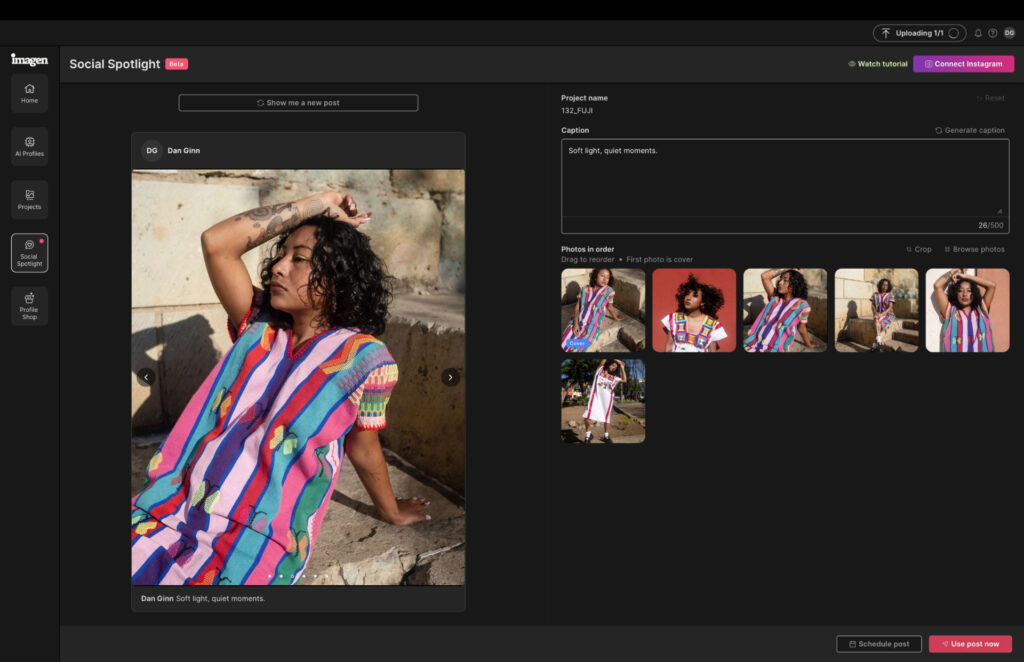
Social Spotlight for Instagram management.
Who Is Imagen AI For?
Imagen AI is built with a specific type of photographer in mind, and it’s worth being honest about that rather than suggesting it works for everyone.
If you’re a working professional managing a consistent stream of bookings, it genuinely transforms the post-shoot side of your workflow. The time savings aren’t marginal, they’re substantial, and for photographers looking to scale their business without hiring an editing assistant or sacrificing evenings to Lightroom, Imagen makes a compelling case for itself.
Where it starts to make less sense is at the other end of the spectrum. Beginners and enthusiasts would be better served elsewhere. Lightroom remains the gold standard for learning the fundamentals of photo editing, and skipping that process by handing it to an AI doesn’t do your development as a photographer any favors.
Related: Best Photo Editing Software for Beginners
For those who want to push the creative boundaries of what AI can do, Luminar Neo is worth exploring. It takes a more experimental approach and offers a wider range of AI-powered creative tools for photographers who want to go beyond efficiency and into expression. Read my full Luminar Neo review.
Imagen knows what it is and who it’s for. If you fall into that bracket, it delivers. If you don’t, there are better tools for where you are right now.
How Much Does Imagen AI Cost?
Imagen offers two payment structures, pay-as-you-go and an annual subscription, which makes it accessible whether you’re shooting occasionally or running a busy studio.
The pay-as-you-go rate sits at $0.05 per edited image, which works well if you’re only taking on one or two paid gigs a month. For busier professionals, the annual plan make more financial sense:
- Yearly: Limitless Use – $1548 ($129 per month)
For high-volume photographers, the math is straightforward. The annual plan work out considerably cheaper than outsourcing to a human editor, and when you factor in the time you get back for additional bookings, the software starts paying for itself relatively quickly.
Signing Off
After 90 days with Imagen AI, my overall feeling is a positive one. If you’re a photographer who wants to protect their unique editing style without being chained to a screen, it does exactly what it promises. The time savings are real, the edit quality holds up, and once it learns how you shoot it becomes a genuinely useful part of your workflow rather than just another tool you opened twice and forgot about.
It isn’t perfect. The manual adjustment experience needs work, and the fact it relies on Lightroom rather than standing on its own two feet holds it back from being something truly special. But the foundations are strong, and if Imagen can fine-tune those rough edges and push towards becoming a standalone platform, it has everything it needs to become a serious force in the photo editing space.
For now though, it earns its place in a professional workflow. Give the 14-day trial a go and see what it does for yours. Sign up here.
More reading: Aperty Review: Is This AI Portrait Editor Worth the Switch?
This article contains affiliate links. If you buy through them, we may earn a commission at no extra cost to you. Read our Affiliate Statement.