It’s been almost a year since my last Luminar Neo review, and during that time it’s received several updates, including new features and performance improvements. Their largest update came in the fall of 2025 and it makes sense for me to share my recent round of testing, and if I still consider it one of the best photo editing software.
Born in 2022, Luminar Neo certainly is a new kid on the block. However, it’s already become a popular kid in the photo editing software playground. It has plenty of features from basic adjustment tools to advanced AI automations that push through the boundaries of your final frame.
In this review I’m sharing how well Luminar Neo’s features actually work, who they’re suited for and how much you can expect to pay for them. I’ll also be sharing my real-world usability experience, what’s good and what areas can improve.
Luminar Neo: At a Glance
| Luminar Neo | Top Features | Best Price | Compatibility | Best For |
| Auto enhance,Sky replacement,Removal tools, masking toolsAI assistant | $159 perpetual licence (desktop and mobile apps). | macOS, Windows, iOS, Android, ChromeOS | Beginners, enthusiasts, content creators |
TL;DR: My Luminar Neo Review
I really enjoy using Luminar Neo. The modern, vibrant design makes it fun to use, while also offering simple navigation so I can access tools quickly. From masking tools to powerful AI automations, it has everything I need to edit photos. Some of the features seem overkill, and performance isn’t quite on a par with others, but neither of those are dealbreakers for me.
The layout makes it perfect for those learning the ropes of digital photo editing, and the depth in features means it’s also suitable for enthusiasts and advanced photographers.
There’s a 14-day money back guarantee so you can try risk free with confidence.
Sign up for Luminar Neo. (Use code THEMFRAMES10 for a discount).
I recommend watching the video below to see my real-world use experience.
Luminar Neo Review: Features
Luminar Neo covers a wide range of tools, from familiar manual adjustments to more ambitious AI-driven features. Rather than listing everything available, I’ll focus on the tools that genuinely shape the editing experience and where Luminar Neo stands out.
AI Tools
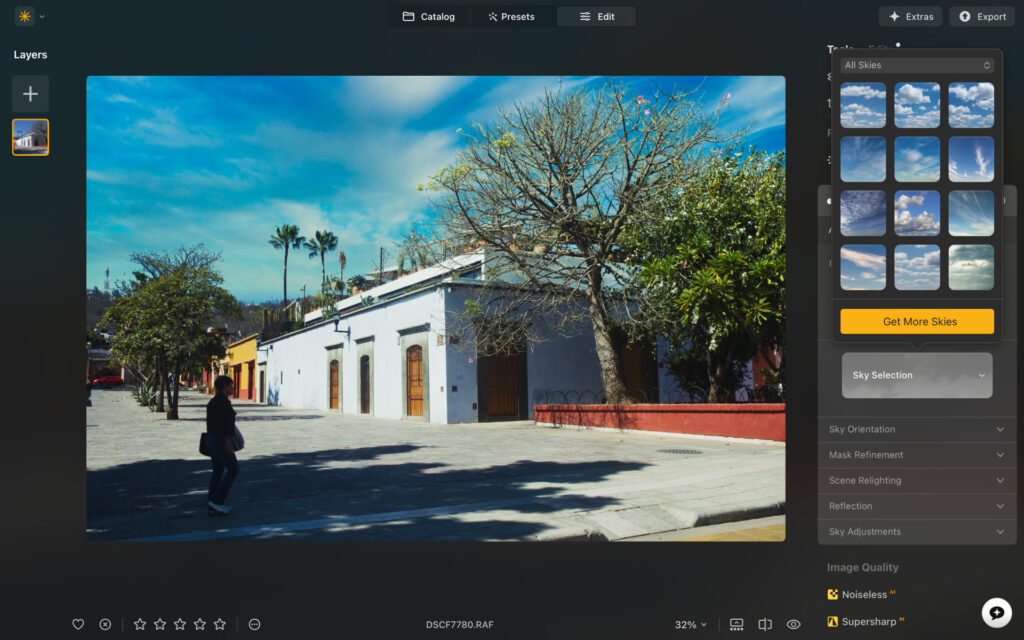
An example of the sky replacement tool.
AI plays a central role in Luminar Neo, but it’s largely optional rather than forced. Tools like auto enhancement and AI crop aim to speed up common adjustments by analyzing your image and making contextual decisions around exposure, composition, and structure. Results are generally solid, though not always something I’d apply without tweaking.
The standout addition in the latest update is the AI Assistant. By entering a short written prompt, you can ask Luminar Neo to make specific changes to an image. It returns three variations, giving you a choice of direction before refining the edit manually. For light guidance it works well, though it still struggles with more complex follow-up prompts.
Other AI-powered tools include object removal, noise reduction, enhanced detail, and sky replacement. Landscape shooters will likely enjoy the sky and twilight tools, while object removal is now strong enough to compete with Lightroom in most everyday scenarios.
Related: Best AI Photo Editor in 2026
Core Editing Tools
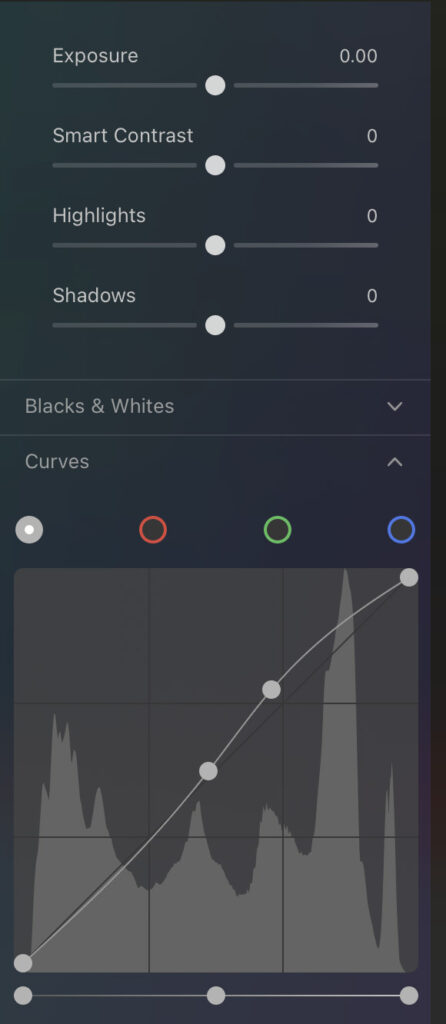
Alongside the AI features, Luminar Neo offers all the standard adjustment tools you’d expect. Exposure, contrast, highlights, shadows, whites, and blacks are controlled via responsive sliders, with curves are available for more precise tonal control.
Color adjustments are equally well covered. You can work globally with vibrance and saturation, or dive deeper using HSL controls to fine-tune individual colors. Split toning tools allow you to introduce subtle color into highlights and shadows, which is useful for shaping mood without heavy-handed effects.
Advanced Tools
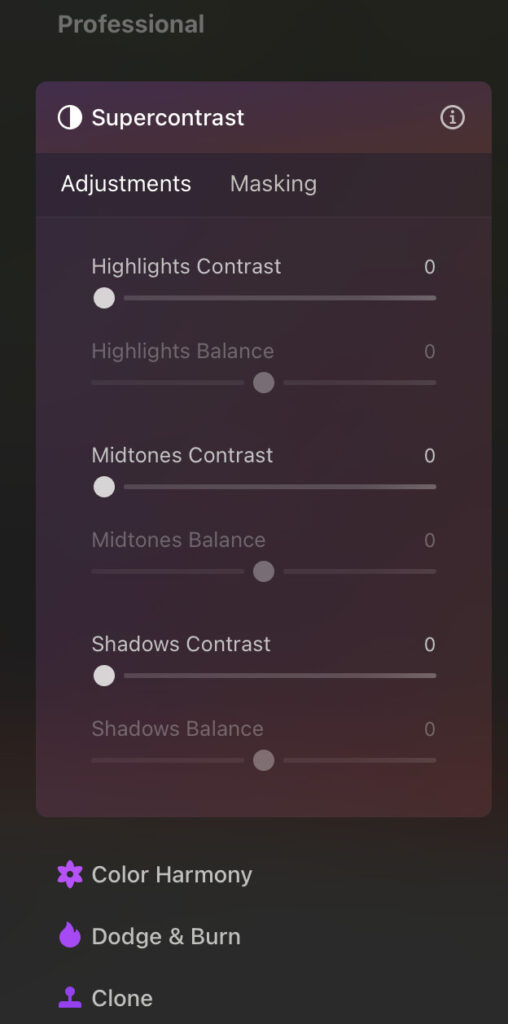
Some of Luminar Neo’s newer tools push beyond basic editing. Light Depth lets you control where light appears to fall within the frame, helping guide attention through an image. Super Contrast allows you to target contrast specifically in highlights, midtones, or shadows rather than applying it globally.
Masking is also well implemented, with linear and radial gradients, brush masking, and AI-powered subject selection. One of my favorite additions is the Color Transfer tool, which analyzes a previously edited image and applies its color grading to a new one — a handy way to maintain consistency across a series.
Presets
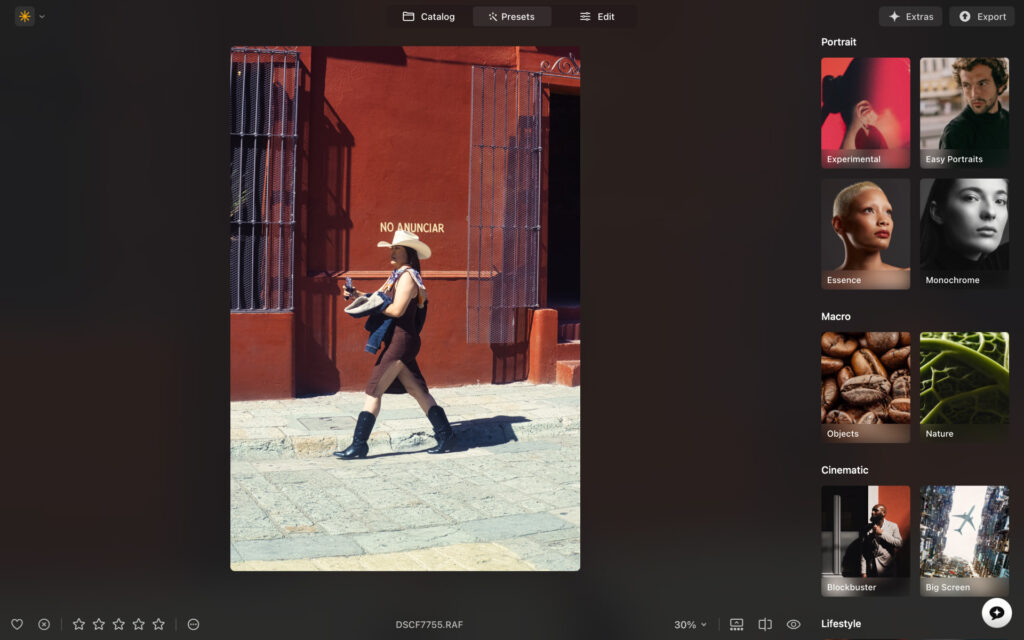
There are plenty of free presets and you can purchase more if you wish.
For faster edits, Luminar Neo includes a wide range of presets covering different styles and genres. They work best as starting points rather than one-click solutions, and experimenting outside the suggested categories often produces better results.
Smart Search & Extras

Using the restoration tools, I could turn this black and white photo into color.
Smart Search has improved noticeably. Instead of relying on filenames, you can search images by visual content, which works surprisingly well in practice. Additional tools like photo restoration, upscaling, HDR merge, focus stacking, and panorama stitching fall into the “nice to have” category rather than essentials, but they add flexibility for specific workflows.
Luminar Neo Review: My Real World Experience
My user experience with Luminar Neo is overall excellent, but there are some tweaks I think it could make to make the overall experience better. I’ll start with what’s working for me.
I adore the design. It’s totally in line with modern standards and the app looks beautiful both on desktop and mobile. The color-coded sections really work for me. Not only because they’re easy on the eye, but they also make navigation much easier as your brain learns which tools are associated with specific colors.

The yellows, blues and greens really pop un the editing panel.
The software itself runs smoothly enough. I’m testing on a five year old Macbook Air (M1) and images load up quick enough and edits are implemented instantly without lag. Performance isn’t as smooth and rapid as Lightroom or Capture One, but it’s not so far behind that it’s a problem.
I’ll say, while navigation is easy, things could be simplified. For example, there are three different sections pertaining to Denoise. Also, some of the tools feel more like fluff rather than essential.
I’d like to see a more condensed version of the app that focuses on the very best tools, rather than offering too much. That’s just me though and some may welcome the high-level of diversity.

I search for flowers amongst 357 images with good results.
Smart search was accurate in my testing. I also like that I can filter images through adding stars (1-5) and tapping a like so I can get into my workflow with no unwanted images.
AI can be useful. The sky replacement tool was cool to use, and object removal was impressively accurate and consistent. I wasn’t big on the auto enhancement feature and would much prefer to do it myself or use a preset. The denoise tool did a very good job, reducing noise without making the image look fake.
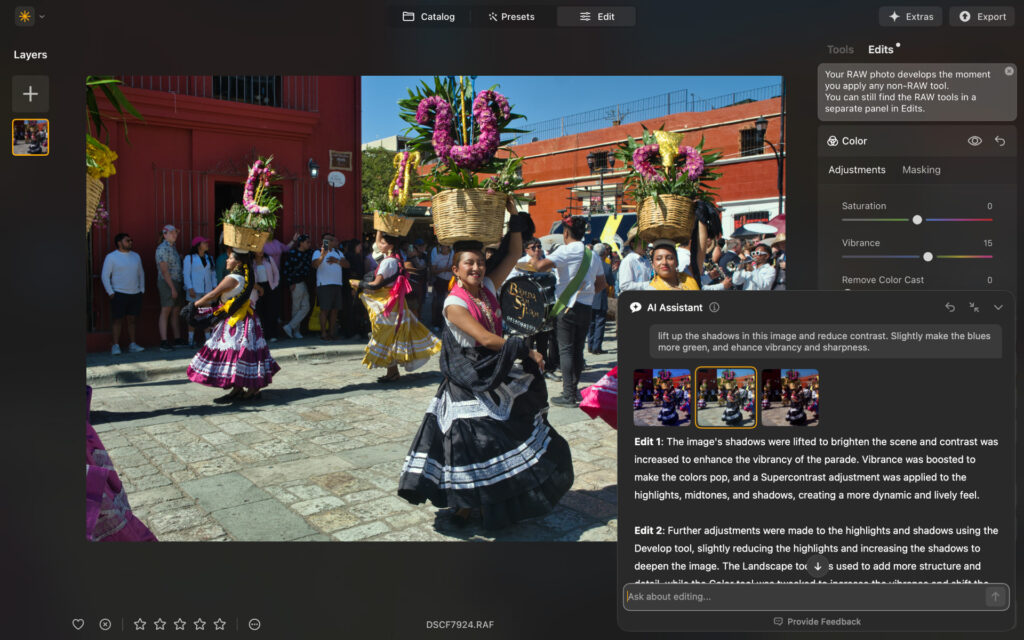
The AI assistant did a decent enough job of following my prompt, but it struggled with follow up prompts, meaning I had to go in and do the adjustments manually. It’s still in BETA and for light prompts it can do a good job.
Although Luminar Neo is simple enough for beginners, there is some welcomed guidance. Each tool has an “i” logo which, if you hover over it, explains what each tool does. There are plenty of useful blog posts and a dedicated YouTube channel so you can dive deeper into the software’s possibilities.
Luminar Mobile
I really like the mobile app. It comes with haptic feedback that makes it an immersive editing experience. While many of the features are the same, the layout and functionality is tweaked for mobile. I recommend watching the video below to get the best understanding of how Luminar Neo works…
How Much Does Luminar Neo Cost?
I love Luminar Neo’s pricing model. Rather than tying you into monthly or yearly payments, you can just buy it outright and it’s yours to own forever, just like the good old days. It’s very affordable too with three tiers available.
- Perpetual Desktop License – $119 (macOS & Windows)
- Cross-Device Perpetual License – $159 (Desktop plus mobile apps)
- Perpetual Max License – $179 (Desktop, mobile apps, and access to an expanded creative library with additional presets, LUTs, and advanced tools)
Who is Luminar Neo For?
Luminar Neo is best suited for beginners and experienced enthusiasts. Those who want to develop their photo editing skills and those who are perhaps posting to a large social media network, selling prints, and creating content.
Sure, professionals could use it. But I think it lacks the flexibility and pro output someone who’s making money from photography would expect – for you I’d recommend Lightroom or Capture One.
Whatever your experience, you can try it for yourself and see if it fits into your current photo editing workflow.
Sign up for Luminar Neo and use code ThemFrames10 for further discount.
Related: Best Photo Editing Software for Beginners
Signing Off
After a solid year of updates and hands-on testing, Luminar Neo remains an enjoyable, capable, and creatively empowering photo editor. It strikes a nice balance between ease of use and depth, with thoughtful AI tools, a welcoming interface and a pricing model that feels refreshingly fair.
If you’re curious to see how it fits into your own editing process, the best way to decide is to try it yourself. Sign up for Luminar Neo and see what it can do for your images.
More reading: Luminar Neo vs Lightroom
FAQs
Is Luminar Neo worth getting?
Yes, Luminar Neo is a powerful and dynamic photo editing tool that gives more life to your images. It’s very affordable too, offering a one-time payment and making it ideal for those who don’t want to get tied into monthly and yearly fees.
Is Luminar Neo better than Lightroom?
For me, Luminar Neo offers a better user interface than Lightroom, while also offering some of the same features and tools. Lightroom is likely better for professional use, while Luminar Neo suits beginners through to experienced enthusiasts.
Article updated January 13th, 2026. I have rewritten this review to reflect new software updates and another round of extensive testing.
Read our Affiliate Statement.