
This article contains affiliate links. If you buy through them, we may earn a commission at no extra cost to you.
TL;DR: ON1 Photo RAW Review
- ON1 Photo RAW delivers class-leading noise reduction and sharpening, along with a genuinely useful set of AI-powered organizational tools that make culling and keywording far quicker.
- The one thing holding it back is occasional performance stumbles, with the odd spinning wheel and a few forced quits during my testing.
- With a buy-it-once perpetual license and a full suite of pro-level editing tools under one roof, it’s an excellent value option for photographers who’d rather own their software than rent it.
For the past nine months, I’ve been testing ON1 Photo RAW, and while it didn’t grip me at first, the updates it has received are making my overall experience more positive. The software has a lot going for it in terms of tools that can make photo editing easier and more enjoyable. There’s also one feature that I absolutely love, and I’ll dive into that and more in this ON1 Photo RAW review.
When I first began using the software, I was using a five-year-old M1 MacBook Air, which only had 8GB of RAM. Out of all the best photo editing software, ON1 Photo RAW struggled the most with the limited and now dated hardware. Since upgrading to the M5 MacBook Air, with 16GB of RAM, my performance experience has been much better, with almost everything working smoothly.
Throughout this review, I’ll be sharing features that deserve the most attention, critiquing the general user experience, and looking at how much you’ll need to pay to use the photo editing app. I’ll also make comparisons to its competition, such as Luminar Neo and Lightroom.
I should note, as a portrait photographer, those are the core images I used during my testing. However, I also tested its capabilities on some landscape and cityscape shots as well. All the images I used were RAW files from my Fujifilm X-T3 camera.
Stand-Out Feature: Noise & Sharpening Tools
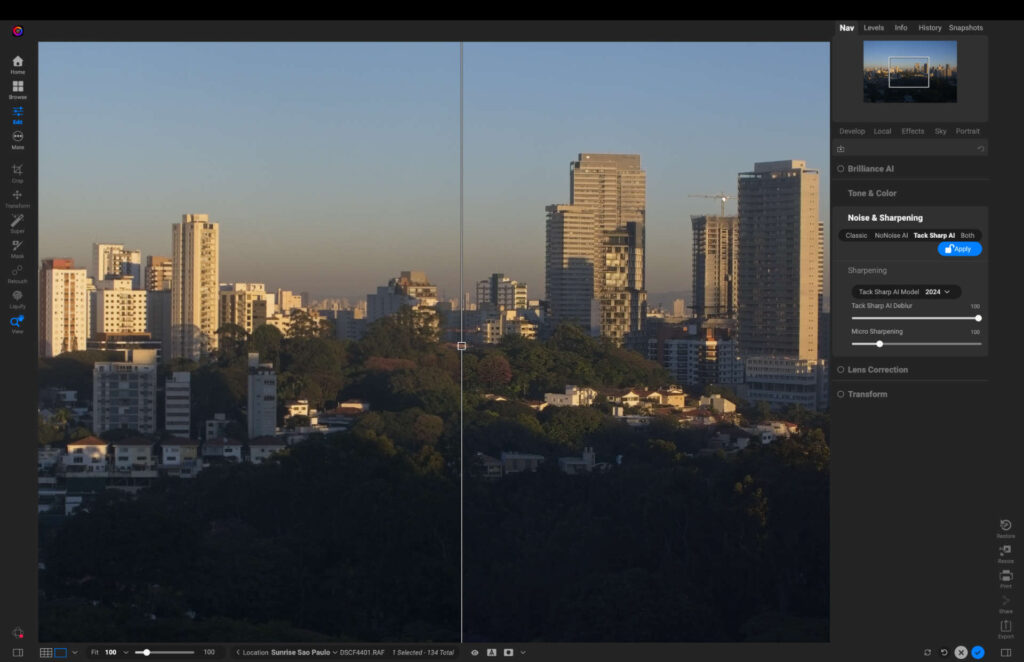
Let’s start with the feature I said I absolutely love. Having tested several Denoise and sharpening tools, I’ll comfortably tell you ON1 Photo RAW’s are among the best. The reason I say that is because the software does a remarkable job of enhancing sharpness while still making sure everything remains realistic.
The same is true with noise reduction, as it takes away all the grain but still keeps valuable details intact.
Image shot at ISO 2000 – with noise reduction applied.
There are, however, two ways to achieve results, and one is better than the other. There’s the classic way; moving luminance and sharpening sliders, and there’s the modern way; allowing AI (artificial intelligence) to do the work for you. It’s the latter of the two that gave me the best results, and there are also sliders to make tweaks if I wish.
Press play for a before and after…
Portrait Editing Tools
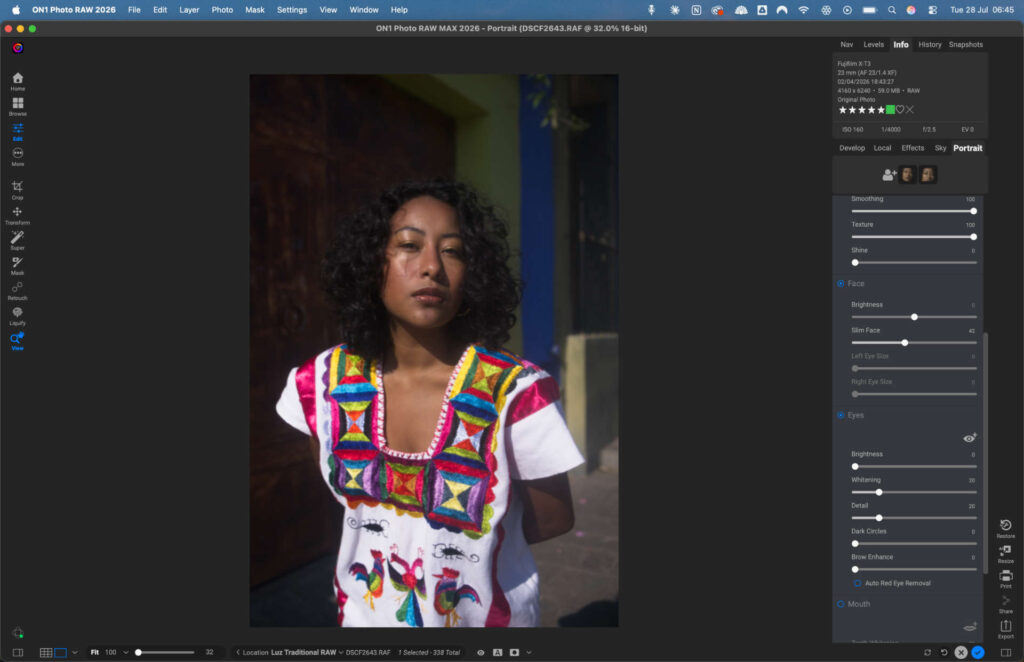
ON1 Photo RAW offers a dedicated Portraits tab, where you’ll find several sliders that can make adjustments to different parts of your subject. Using an image from a shoot I did in Oaxaca, Mexico, I tested everything that’s available in this section of the software.
The blemish removal tool promises to remove things such as pimples and skin indents. It did a good job of detecting imperfections, but it did not remove them entirely. I personally prefer this as it prevents the subject from looking unnatural, or like a painting.
Before blemish removal
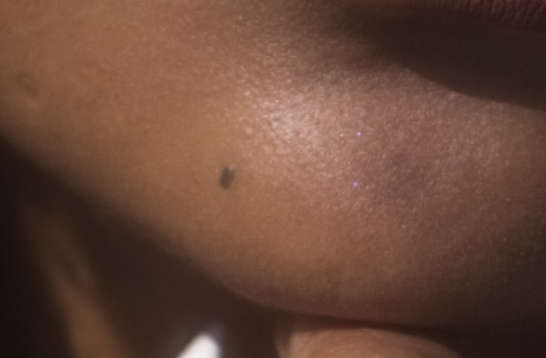
After blemish removal….

Among what’s available is a shine removal tool, to remove the glossy look you can find on a subject when shooting in uneven lighting conditions. Frustratingly, I didn’t have positive results with this feature, and it made little to no changes to the shine, even when I pushed it to maximum capacity.
The Face section of the portrait tools allows you to reshape your subject. Now, I’m not someone who likes to use this, but in practice, you can make a subject’s face thinner and their eyes larger and wider.
The slimming tool does work okay, but only when used lightly. I noticed when slimming the face, the background distorted too. Other apps, like Aperty have found ways to slim the face without impacting other parts of the image – ON1 should really get to this point in future updates. You can also brighten the face too, to give it more life and leave other areas underexposed.
Press play to see face slimming tool.
For eyes, I think the dark circles removal tool works great. It lifts them very well and it doesn’t make the eyes look hazy. The same is true with eye brightness, which allows you to uplift the exposure of the eyes; combining this with some local sharpening of the eyes gives excellent results. Similar tools like Capture One offer the same features, and I think ON1 is on a par with other professional editors in this department.
Color Grading & Presets
You can perform color grading with ON1 Photo RAW in multiple ways. The traditional way allows you to set your hues and saturation within the midtones, shadows and highlights. The implementation here is standard, and I couldn’t see any difference to the way Lightroom and Capture One offer the same color-grading workflow.
There’s also around 10 color grading presets to choose from. They differ from usual presets in the sense they only apply changes to color grading, without making other standard adjustments. They’re fine, though I felt they leaned too much into warmer tones than cooler options.
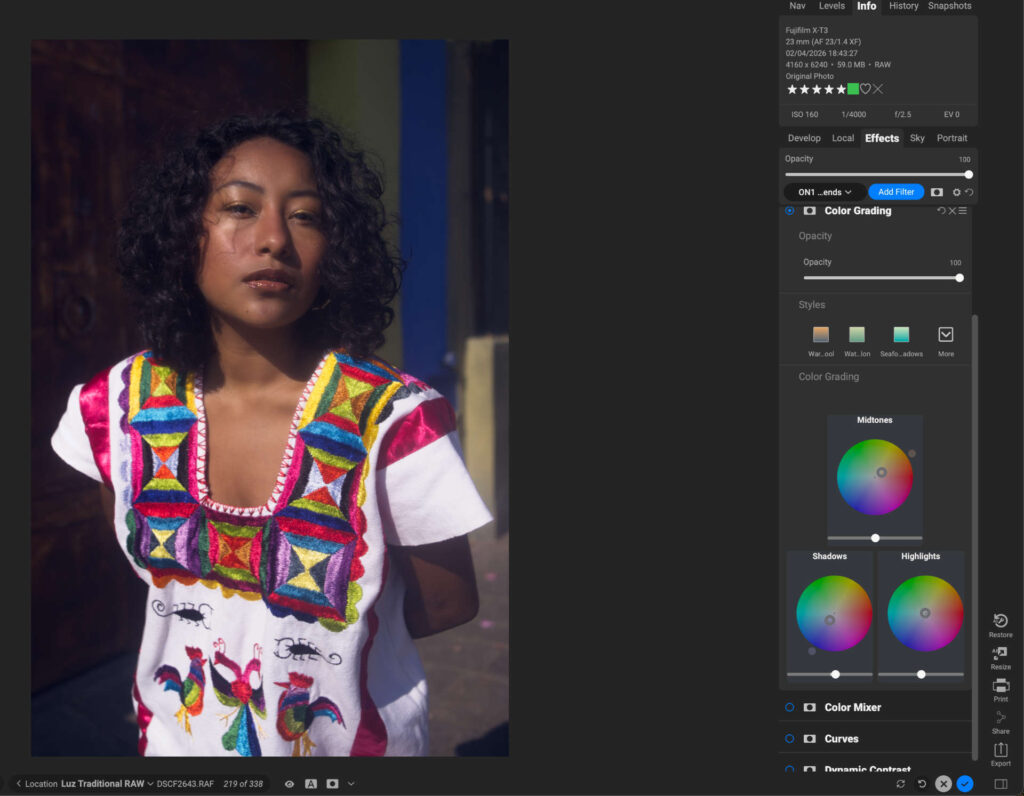
The more in-depth presets available – of which there are plenty – for me, were very Jekyll and Hyde; some are good and some are outright awful. I couldn’t see even a beginner finding them attractive, and certainly not a professional.
For the presets that were worth using, I wouldn’t describe them as a single-click edit solution. I feel ON1 is trying too hard to show what they can create – often, less is more, and I found I still had to make several tweaks to get things where I wanted them. But, they did still serve as a good starting point.
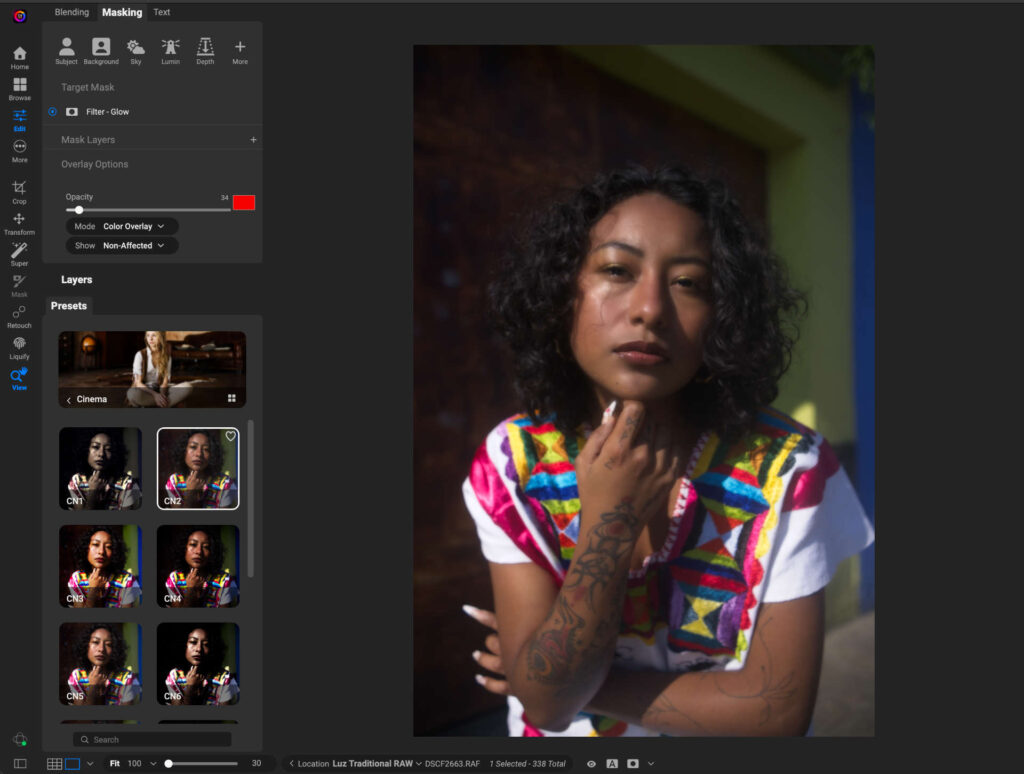
I liked the cinematic preset pack.
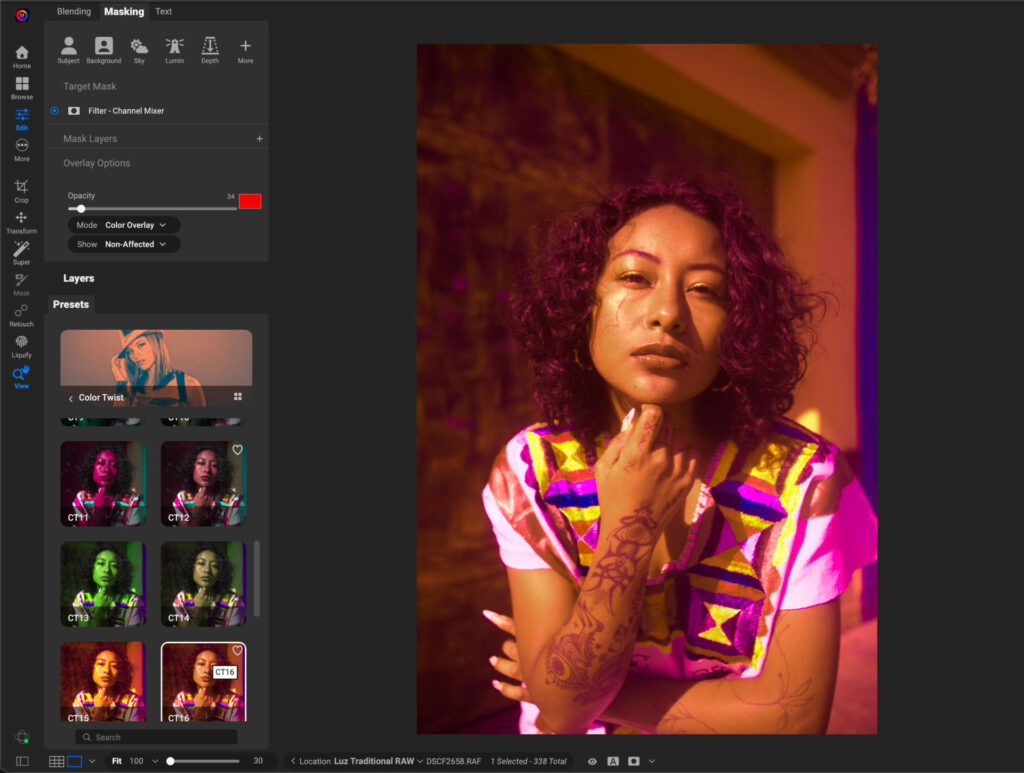
An example of ON1 going too far…
One feature that I found to be very useful, and it’s not one I commonly see is the option to reduce vibrancy on the subject’s skin. This is great to add more powerful colors to the surrounding areas, without making skin look overly red, or orange.
Masking Tools
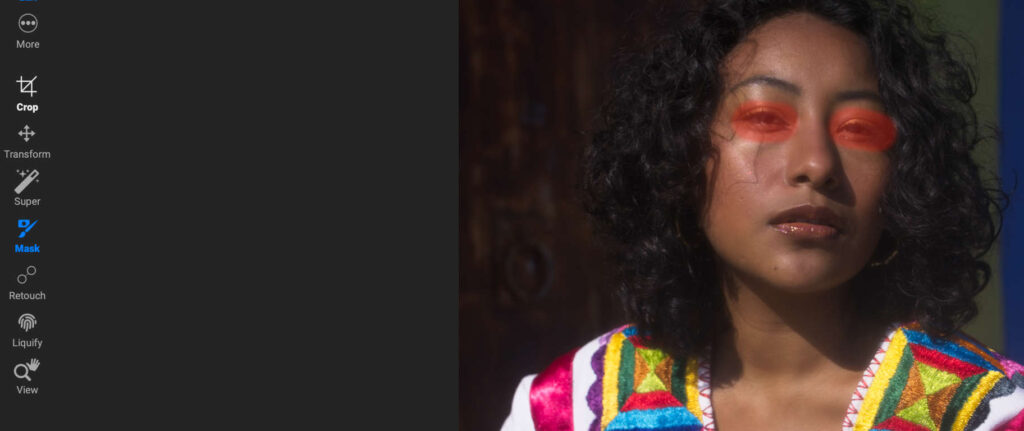
Before getting into the masking tools, I should explain something. Having tested many modern-day photo editing apps, I’ve become accustomed to absolute ease in this department. Take Lightroom’s approach, which allows you to perform many functions with a single click and an adjustment of sliders.
I say this, because ON1 Photo RAW’s masking capabilities feel closer to the Photoshop of yesteryear, where things took time. You can do a lot, like sky, subject and background selection, but the app complicates things by not making it crystal clear how to make local rather than global adjustments. Maybe I’m too harsh, but masking in 2026 should not require a visit to a knowledge base.
Still if you like a more complex approach – and there’s an argument to say this gives you even more granular control over your edits – then working with layers etc. will feel familiar to you and you can certainly go in-depth with your adjustments should you wish.
Sky Replacement
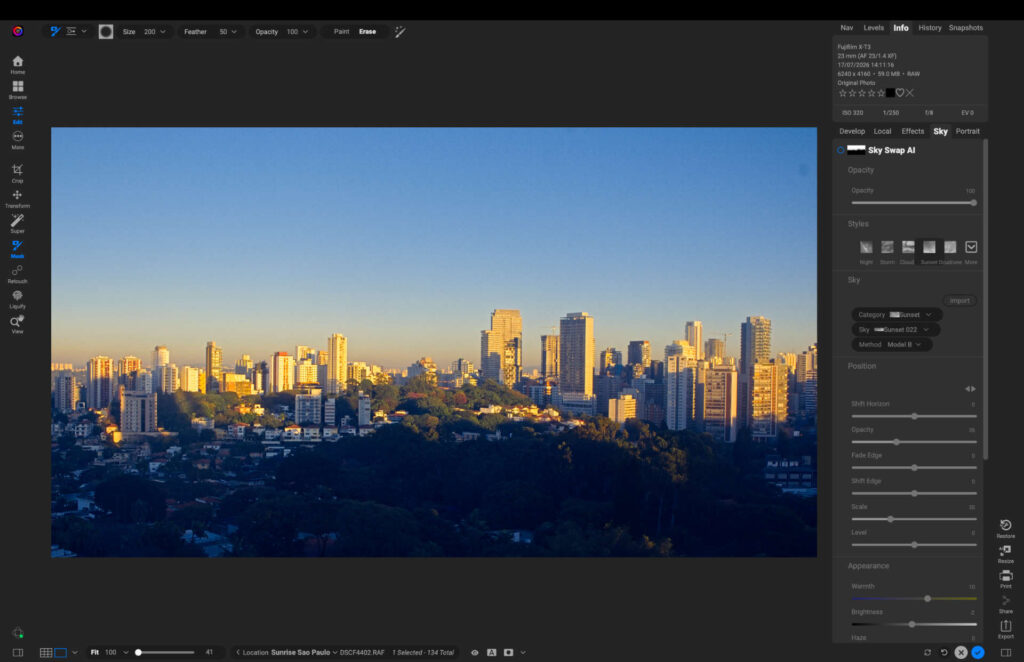
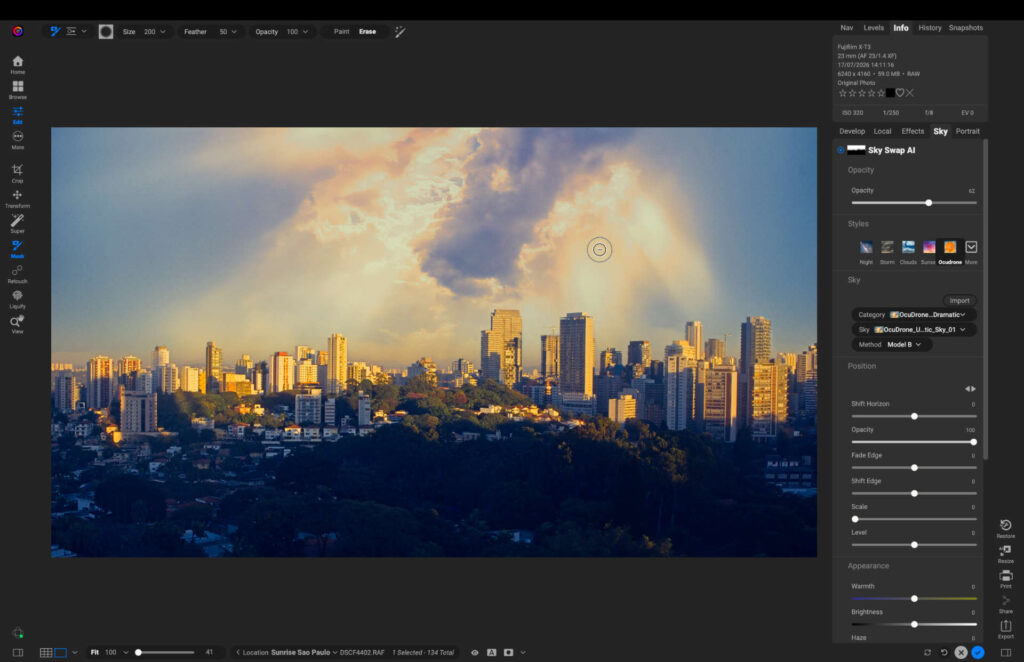
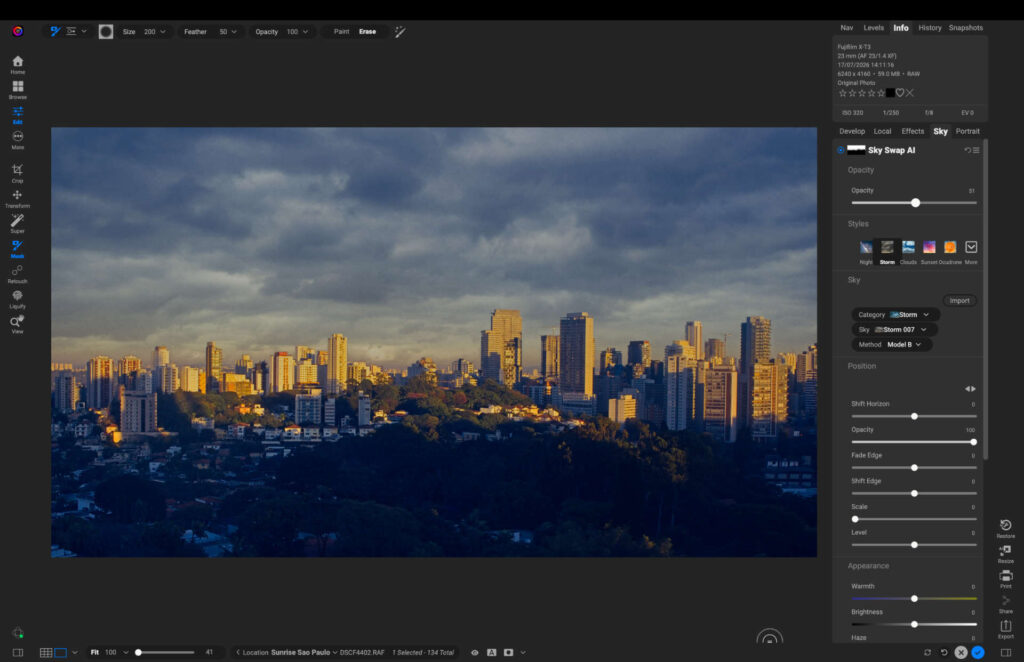
Sky Replacement, which is powered by AI, functions in the same fashion as Luminar Neo, you can completely replace the sky in your image with a range of cloudy skies, sunsets and even Auroras. ON1 doesn’t offer as many sky options as Luminar Neo, and like Luminar some of them felt too unnatural to me right out of the box.
Before applying sky replacement…
After applying sky replacement
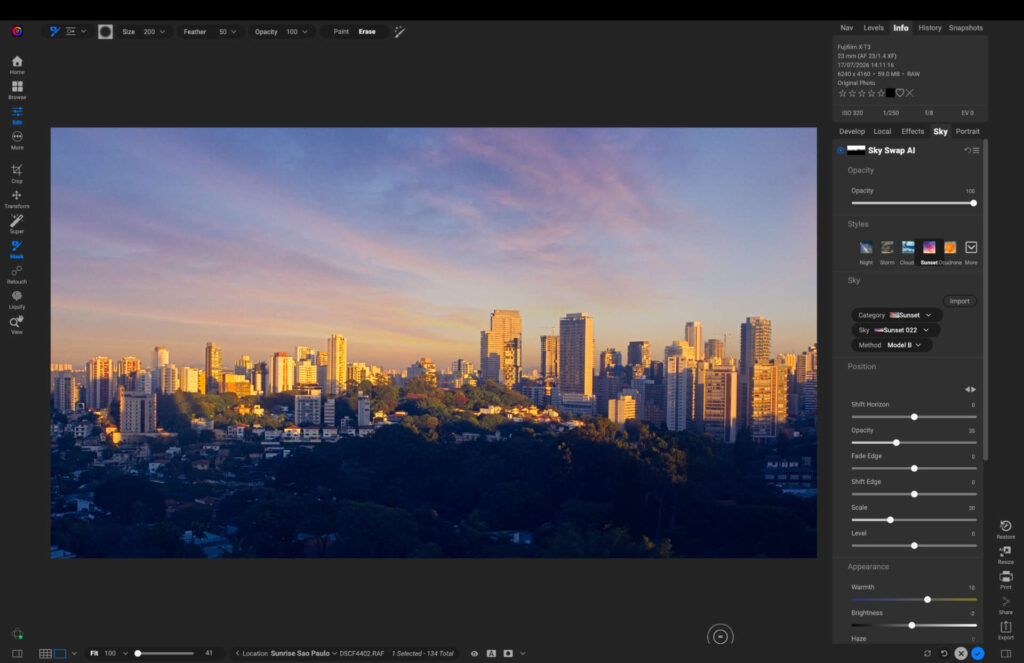
However, there’s plenty of manual controls available to find a sweet spot. In my testing, I found lowering the opacity, adding some subtle blur and shifting the white balance to warmer tones produced better results. As I say there’s plenty to play with so you can get the sky looking exactly how you wish.
Examples of other options…
Design & Ease of Use
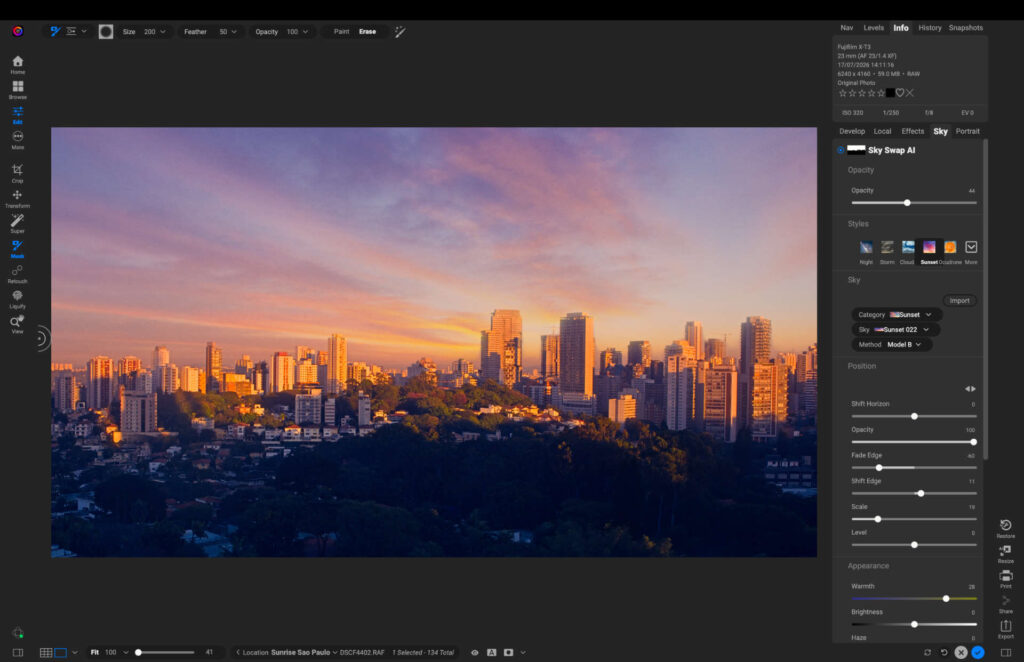
The first thought that sprung to my mind when using ON1 Photo RAW was that the platform sits firmly at the intersection of professional and creative.
The user interface is logical, with tools sitting neatly behind different categories. Most of the adjustment tools are in the right hand panel, and I like that you can adjust the width of the panel to suit your viewing needs. The masking tools sit narrowly in the left hand menu, which again you can adjust to your liking.
There’s one improvement I’d like to see. Most features are toggled off by default. And, unlike Photomator for example, which has large toggle buttons, ON1 has tiny dots which can sometimes take a couple of clicks to toggle on (unless you’re amazingly accurate).
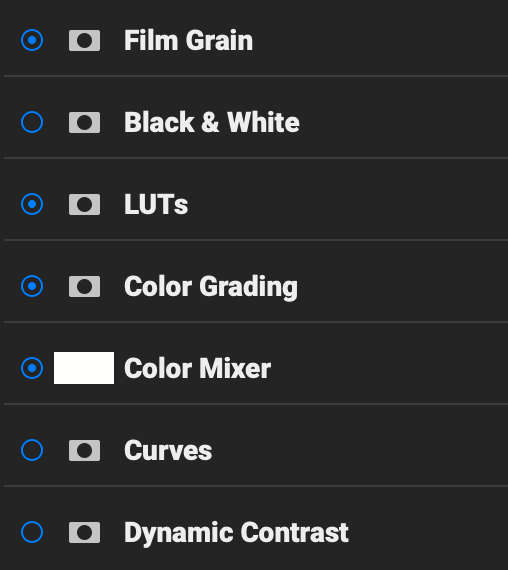
This is minor, but if you’re used to features being activated by default, you’ll likely start using them and realize they had no impact due to being toggled off, causing a slight disruption to workflow.
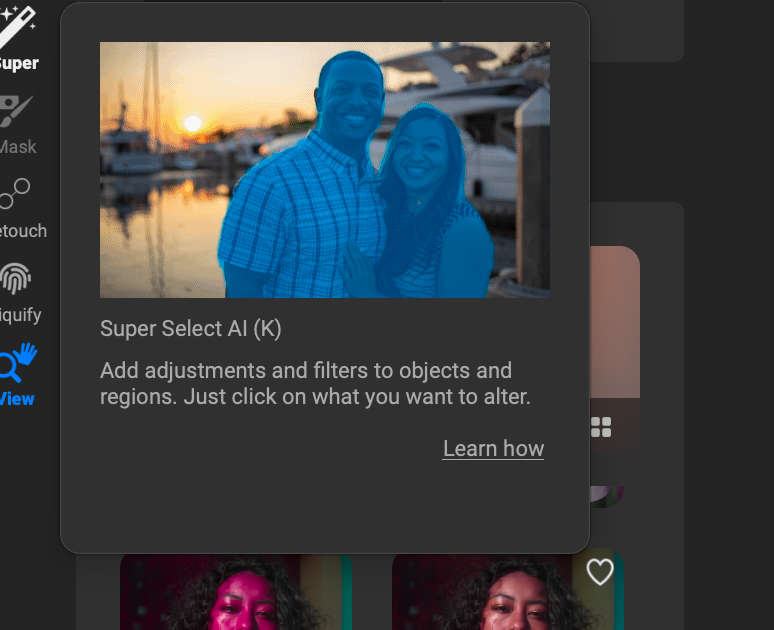
A good part of the masking tools, especially for beginners, is that when you hover over a tool, a popup appears explaining how the tools function. I’d like to see this implemented for all features in ON1, as other software does and it just makes it much easier to learn as you work inside the app.
Overall I’m very much feeling the design of the desktop software and its overall spacing and navigation didn’t result in visual fatigue during extended editing sessions.
File Management
ON1 Photo RAW gives you a few quick ways to get back to your images. There’s a recent page that keeps your latest folders one click away, which I found handy for picking up a shoot I’d been working through the day before. You can also browse your local folders directly inside the app, with no import step first.
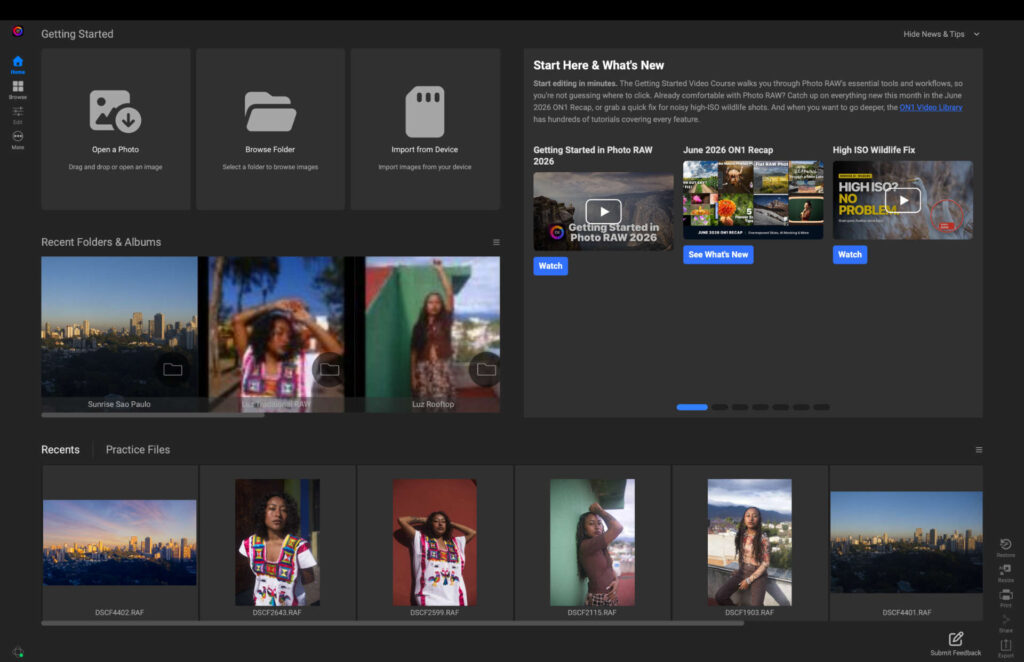
That last point is worth dwelling on. Unlike Lightroom, which makes you import into a catalog before you can touch anything, ON1 lets you point it at any folder on your drive and start culling and editing right away. For someone like me who moves between machines and rotates external drives, skipping that ritual is a real time-saver and keeps my existing folder structure intact.
There is a trade-off to that approach worth knowing. Because ON1 reads your images straight from the folder rather than importing them, the drive they live on has to stay connected, whether that’s your laptop, an external drive, or an SD card. With Lightroom you import the files into its catalog, so you can keep browsing and editing them even when that drive is unplugged.
AI Keywords
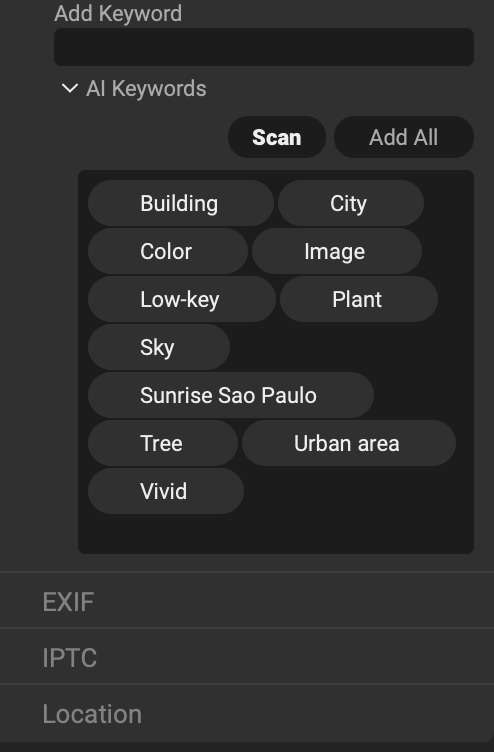
A feature I really like is AI keywords. The software scans your images and generates keywords on your behalf, such as “low-contrast” and similar descriptive tags. Beyond speeding up sorting, I found it genuinely useful for building a keyword system when my brain was drawing a blank on how to categorize a set. Manual keywording is there too if you prefer full control.
Smart Organize
Smart Organize is another one worth your attention. It scans your folders and picks out duplicates, along with frames shot at the same time and location, so you can group images fast and clear out anything similar or redundant. For culling a large batch from a single shoot, this took a chore off my plate and left me with a cleaner set to work on.
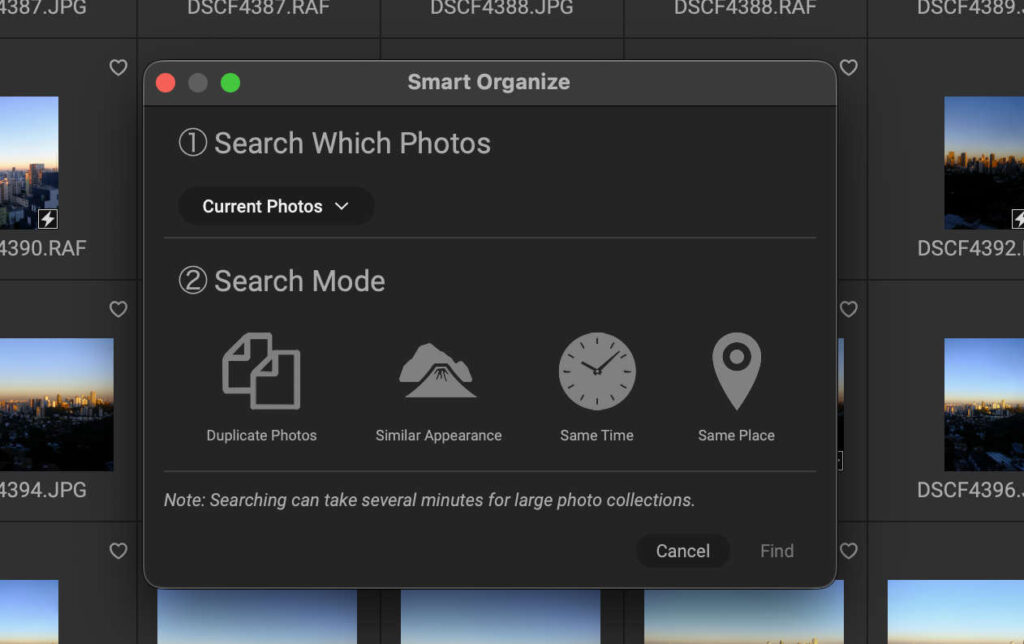
Photo Culling
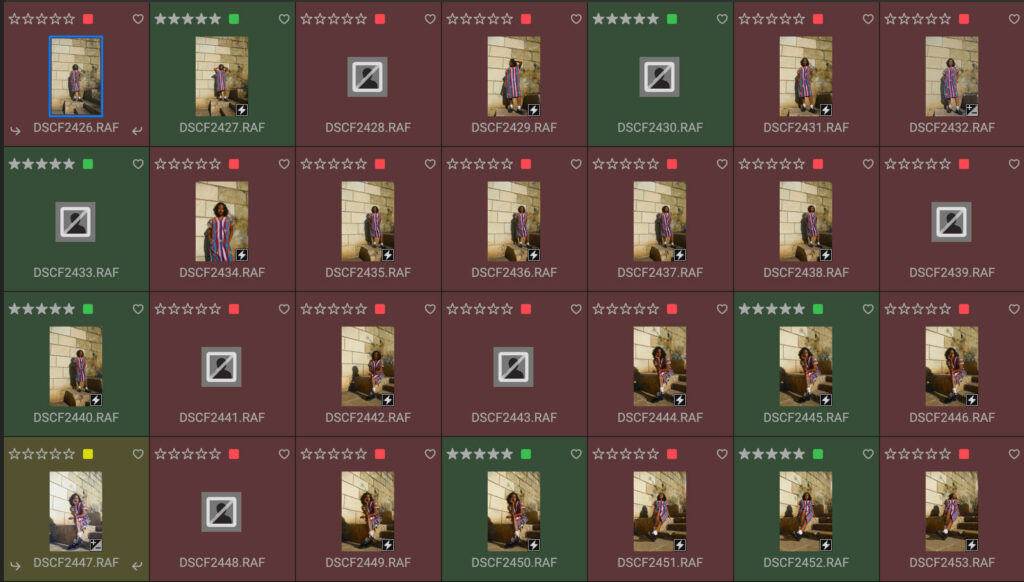
For the culling itself you get the usual ratings, likes and color labels, and if you want faster searching across everything, you can add folders as cataloged folders to unlock database-style search and smart albums. It’s a solid, familiar toolkit that doesn’t get in your way.
Related: I Tested The Best Photo Culling Software (A Clear Winner in 2026)
There’s cloud storage available too, which is a nice perk if you’d rather not eat up local space. Depending on your plan, cloud sync ranges from 200GB up to 1TB of storage. Overall, I’d place ON1’s file management firmly on the pro side, striking a balance between strong folder and file sorting and genuinely useful features that make locating and culling images much smoother.
ON1 Real-World Performance
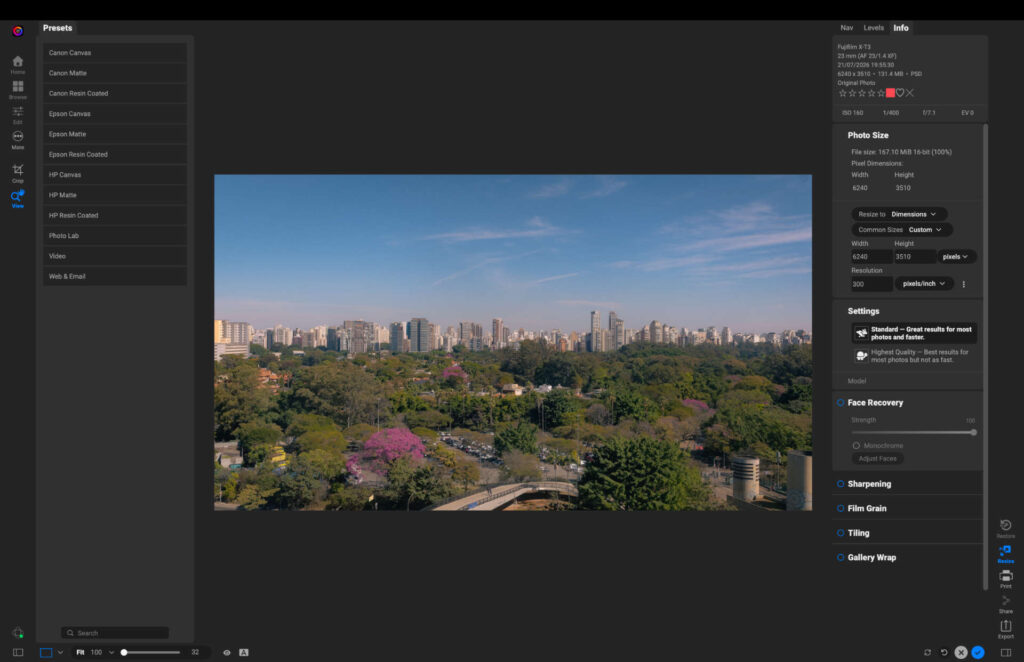
As noted earlier, performance has certainly improved since upgrading my hardware. Imports and exports are fast, and even advanced functions like AI Resizing – which upscales your photographs, allowing you to print bigger – only takes a couple of minutes, without concern.
The Develop module handles the everyday adjustments, exposure, contrast, tone curve and the rest, and the sliders respond in real time as you’d expect any modern editor to. Nothing remarkable, but no lag or hesitation either, which is exactly what you want from the tools you touch most.
I did run into some spinning wheels, however. When quickly skipping through large batches of images, ON1 would sometimes get stuck and take a second to find its way. And, I’ve had to force quit on a handful of occasions when it could no longer perform my actions.
The good news is that ON1 is fully aware of its flaws, and announced in a recent bulletin that the company’s core focus going forward is to improve what they already have, rather than try to build new features – I will keep testing to ensure the company keeps its word.
As for the most part everything works very well, once the company irons out the performance creases, users can enjoy an impeccable user experience.
Lightroom Plugins
ON1 Resize AI Lightroom Plugin
You’ll sometimes see ON1 Photo RAW referred to as ON1 Photo RAW MAX. The MAX version gives you access to the standalone app, plus the Lightroom plugins. Essentially you’re able to integrate certain sections – such as NoNoise AI, Portrait AI and Sky Swap – into your Lightroom workflow.
They work exactly as I’ve already covered earlier in the review. In my opinion, if you’re going to purchase the full ON1 App, then there’s little point using the plugins in Lightroom, and I feel it disrupts the workflow, rather than enhances it. For example, the Denoise is on a par with Lightroom in my opinion.
However, if you just want the plugins without the app, then being able to swap the sky and use the portrait tools which are missing in Lightroom (body reshape, for example) then ON1 does offer some of the best plugins available.
How Much Does ON1 Photo RAW Cost?
ON1 lets you buy it outright and own it forever, which I’ll always be a fan of. What’s nice is you also get the choice of a subscription if you’d rather spread the cost, so it flexes to how you like to pay. ON1 discounts often, so it’s worth checking for a live sale before paying full price.
The figures below are ON1’s standard prices, though as I mentioned, discounts are applied often, so you’ll frequently find them for less.
Perpetual (own it forever):
- Photo RAW 2026 – $99.99 (standalone app, 2 computers)
- Photo RAW MAX – $169.99 (standalone plus plugins for Photoshop, Lightroom, Capture One and Affinity, 3 computers, 200GB cloud sync)
Subscription (always the latest version):
- Photo RAW MAX – $89.99/year (all updates, 200GB cloud sync)
- Photo Studio – $179.99/year (every ON1 app, 1TB cloud sync, 5 computers)
Upgrading a perpetual license to the next major version usually costs around $79.99, and there’s a free trial plus a 30-day money-back guarantee if you want to test it first.
Who is ON1 Photo RAW For?
After nine months with it, I’d point ON1 Photo RAW first at anyone tired of renting their software. If owning your editor outright matters to you, this is one of the strongest options going, and that perpetual license is the whole reason a lot of photographers give it a look.
It’s not an overly simplified tool, though, so I wouldn’t point to an absolute beginner here- check out my selection of the best photo editing software for beginners.
Where ON1 shines is for photographers with a bit of experience who want to expand their skills, and for those who need advanced editing tools and are comfortable using them. Portrait shooters and anyone tired of juggling apps get a lot too, with the portrait tools, AI keywording, and RAW, layers, effects and noise reduction all under one roof.
There’s also tethered shooting on board, which makes it an appealing option for professionals who want a more affordable alternative to the likes of Capture One. I should be upfront that I couldn’t test this myself, as ON1’s tethering currently supports only Canon and Nikon, and I shoot Fujifilm.
Even so, having that feature at this price point makes ON1 a compelling do-it-all editor for the experienced, cost-conscious photographer who’d rather own their tools than rent them.
ON1 vs Luminar Neo and Lightroom
Against Luminar Neo, these two feel like cousins, and it’s the comparison I get asked about most. Both lean into creative AI and both offer a way to buy without a subscription, but they pull in slightly different directions.
Luminar is the more approachable, one-click-look editor, and I’d give it the edge on sheer creative polish and a wider set of skies. ON1 is the fuller tool that targets professionals more directly, with stronger file management, proper layers and, to my eye, the better noise and sharpening.
If you want playful and fast, go Luminar. If you want a complete editor, ON1 is your pick.
Against Lightroom it’s more a clash of philosophies. Lightroom is subscription-only with a polished, cloud-centric ecosystem, and its catalog-driven search and mobile syncing are still the benchmark. Overall performance is better on Lightroom too, with fewer glitches and spinning-wheel moments.
Lightroom’s simplified UI also suits all experience levels, making it perfect for anyone looking to grow their skillset without needing to upgrade software later. ON1 answers with ownership, no forced import, and an all-in-one feature set that includes layers Lightroom doesn’t have natively.
The trade-off is that Lightroom’s masking is simpler and its search at scale is faster, so it’s your ecosystem-and-ease versus ON1’s own-it-forever, do-it-all approach.
Signing Off
With my testing wrapped up, I’m confident ON1 Photo RAW is a more than capable photo editor. Nothing here feels like filler, with every tool serving a genuine purpose. The one thing holding it back is those performance wobbles, which leave it feeling like ON1 is almost, but not quite, all the way there.
That said, it’s close enough that there’s no reason to turn your nose up at it. It’s capable and it’s powerful, and the bottom line is it will help take your image from RAW to stunning, which is why I’m more than comfortable recommending it. I can see why it’s stayed in the game for over 20 years.
Better still, you can try it risk-free with a 30-day trial, so there’s nothing to lose in seeing how it fits your own workflow – sign up here.
More reading: Imagen AI Review: I Tried It For 90 Days and the Edits Shocked Me
Read our Affiliate Statement.