
Photomator is one of my recommended Lightroom alternatives. It’s more affordable, offers a modern design and has most of the tools you need to create strong edits. I understand that may have some people sold on it already, but it’s worth going deeper and learning how it really compares to Lightroom, which is what I’ll do in this Photomator vs Lightroom head to head.
To save you some time, Apple owns Photomator, so it’s only available for macOS, iOS and iPadOS. If you’re using a different operating system, then this one is not for you. Instead, I’ll point you toward my Luminar Neo vs Lightroom comparison, as both are available for Windows.
In this comparison, I’m going to look beyond standard features and see what each photo editing software offers for advanced tools, and whether they’re both suitable for professional workflows. I’ll also cover ease of use, design and how much you can expect to pay.
Photomator vs Lightroom: Pros and Cons
Here’s a quick look at the pros and cons of using Photomator and Lightroom.
Lightroom
Pros
- Far stronger and consistent object removal tools
- More advanced file management
- Regular updates and consistently smooth performance
Cons
- Subscription only
- Default RAW files need more work, with visible noise out of the box
- Mobile app loses the editing panel in landscape orientation
Photomator
Pros
- Lifetime license option
- Cleaner RAW processing and denoise results with less effort
- Modern design and full access to editing tools when masking
Cons
- Only available on Apple devices
- Struggles with larger object removal
- Infrequent software updates
Related: Photomator Review (2026): Is Apple’s Photo Editor Actually Good?
Object Removal
Both platforms have AI-powered object removal, allowing you to brush over objects and remove them from a frame in a single click. I tested both using two images, one with a small object and the other with a larger object, and Lightroom came out on top.
For the basic object removal, a few road barriers and shadows, both handled it well and I was able to get it right on the first attempt.
Orginal RAW file.

Bollards removed with Photomator.
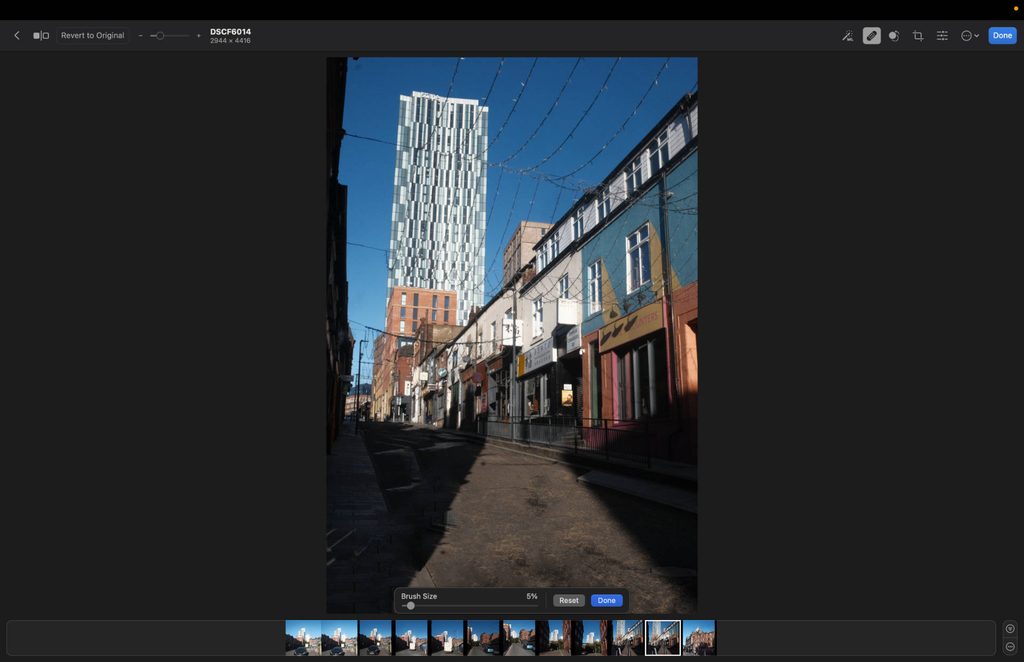
Bollards removed with Lightroom.
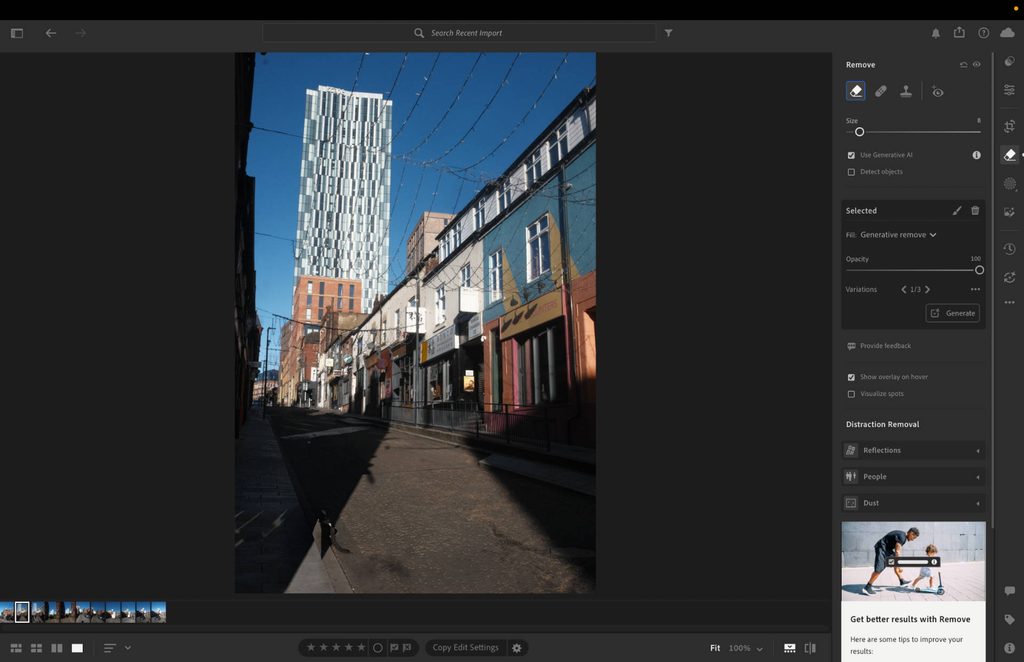
When removing a car, Lightroom was by far the better photo editing software. It removed the car with ease, and it also kept the yellow lines continuous along the edge of the road. Zooming in, you can see there’s a natural look, and zoomed out, few could tell an object was removed.
Orginal RAW File

Car removed in Lightroom.
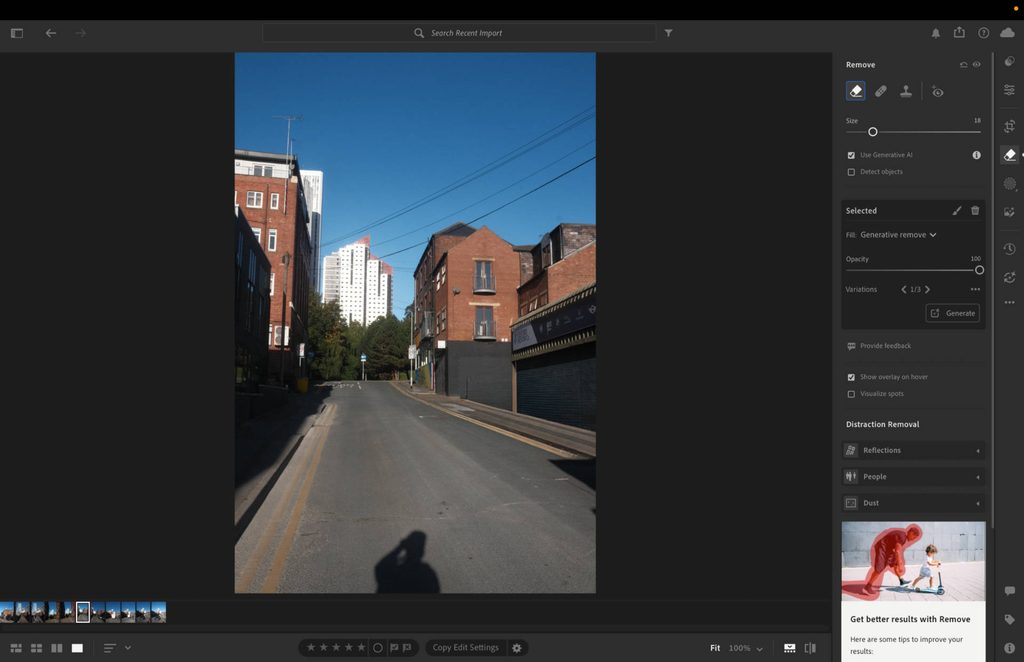

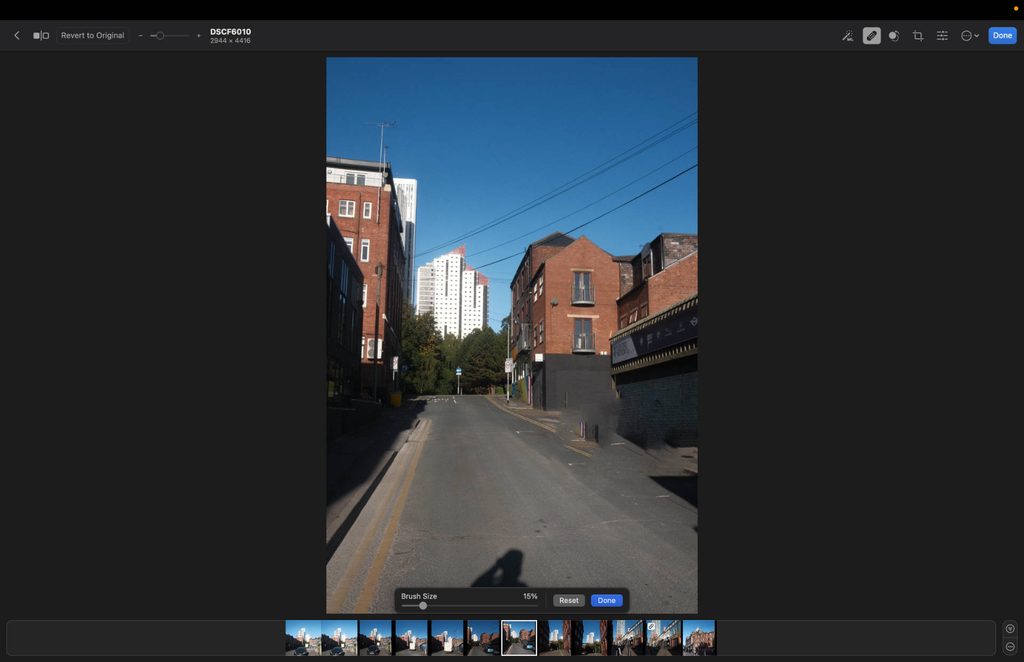
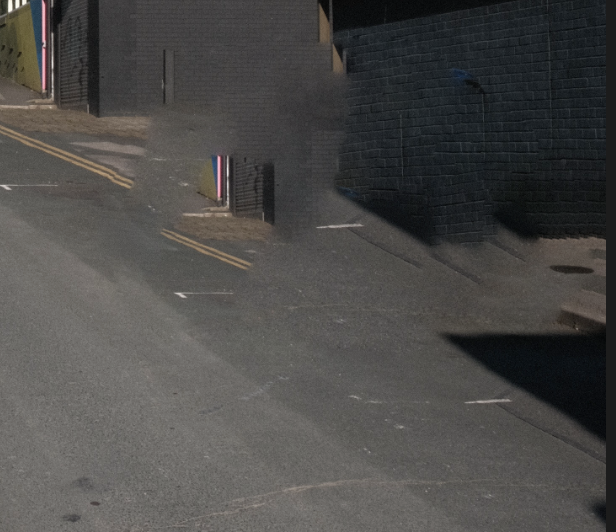
Photomator pretty much failed with the larger object removal. Everything looked unnatural, it placed a section of a wall where the car was, and even after several attempts it could not get it right.
Car removed in Photomator
Another advantage of Lightroom is its object detection, which Photomator doesn’t have. This means it can automatically detect people, reflections and dust, and then you just click remove and it does the job.
Masking Tools
Photomator and Lightroom have similar masking tools, including those that go beyond the classics like radial, linear and brush tools. For example, they both have sky detection, person detection and background detection.
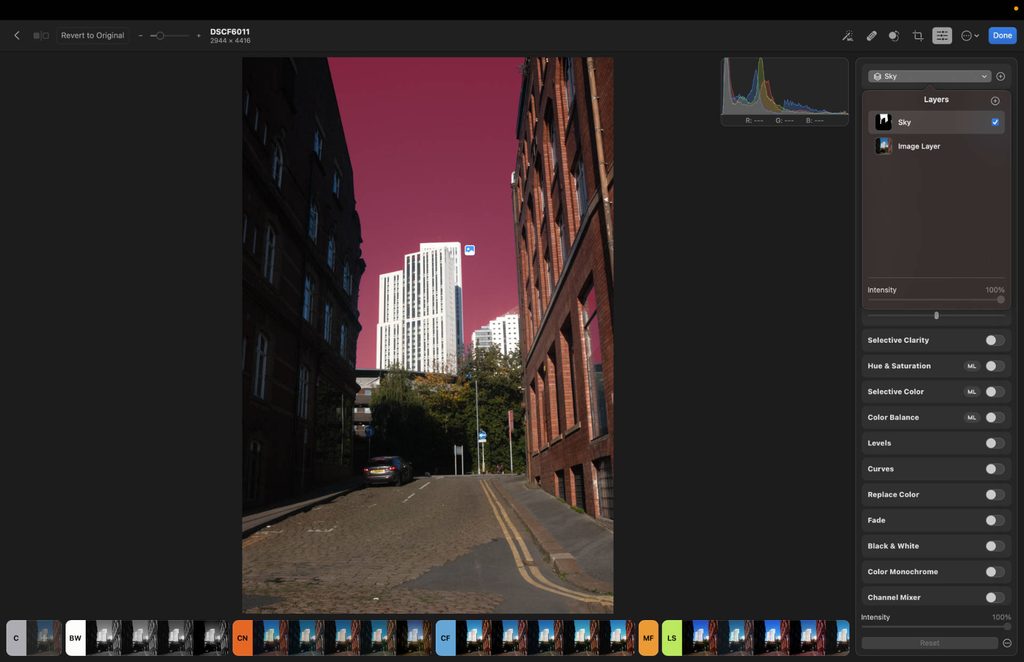
Sky Detection in Photomator.
In my testing, I found that Photomator actually has the edge when it comes to the depth of the edits you can make to most of your masks. When I selected the sky, I still had full access to tools such as HSL sliders, tonal curves and LUTs. Lightroom was more limited, mainly covering exposure tools and some light color tools for white balance and saturation.
However, when it comes to masking people, Lightroom has the edge. It allows you to select specific parts of your subject, including eyes, face, body and clothes, giving you the ability to get extremely granular with your mask edits. By contrast, Photomator selects your whole subject and applies all edits to each element of your subject.
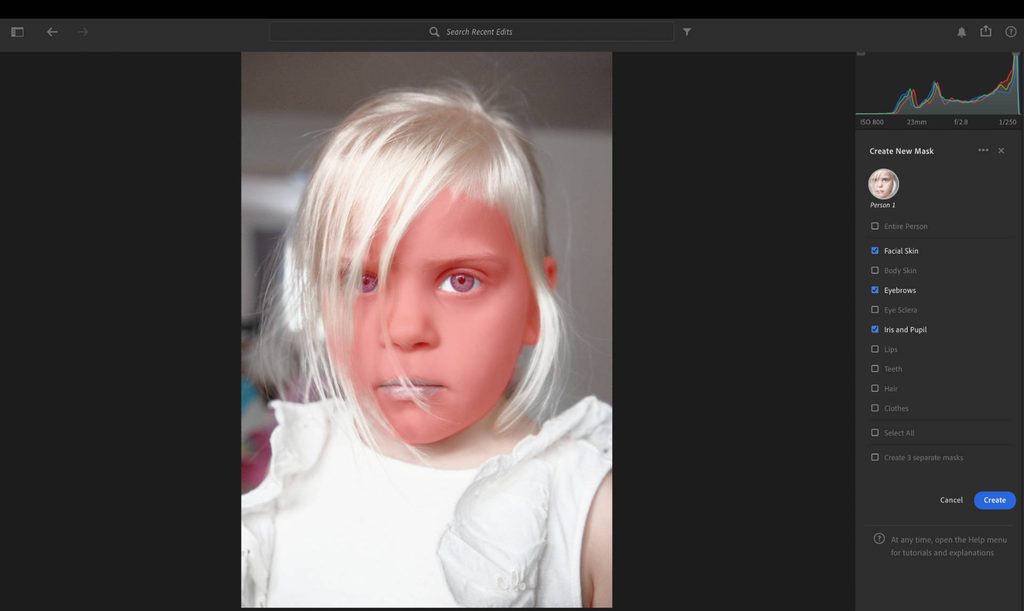
Lightroom masks for people.
Related: I Tested Dozens of Portrait Editing Apps: Why These 5 Are Worth It
I’d say landscape photographers should consider Photomator if masking is a core part of their workflow, while portrait photographers should go with Lightroom.
Denoise
To test denoise, I shot a carton of milk at home in low light, which let me push my ISO all the way to 25,600. That gave both apps plenty of grain to work with. Both did a good job, and neither result looked cartoonish or overly smoothed. Zoomed out, each photo kept a natural, realistic look.
Orginal RAW File.

Denoise applied in Lightroom +75

Denoise applied in Photomator +75

Zooming in to 100% is where Photomator pulled ahead. Its file was noticeably cleaner, with an almost grain-free background, while Lightroom left a fine, mottled grain across the wall and a speckled texture on the white of the carton.
Both kept the lettering crisp, and Photomator held on to the fine ridges in the almond illustrations. The background does look slightly artifical in Photomator, but it was still enough for me to give it the edge.
Both apps take a similar approach to denoise. Photomator assessed my image and automatically set the strength to 75%, and Lightroom also analyzes the file and applies the amount it thinks is needed, with manual controls in both if you want to fine-tune the result.
If you’re looking for the best Denoise tool, I suggest reading my ON1 RAW review.
RAW Processing
I compared how each app handles a RAW file straight out of the camera, using a portrait shot on my Fujifilm X-T3 with no edits applied. The difference is clear from the first look.
Photomator renders the image warmer and brighter, with lifted shadows and stronger yellows in the background wall. Lightroom, using its Adobe Color profile, gives a cooler, more neutral result with deeper shadows and skin tones that lean slightly pink. Neither is wrong, but Photomator’s version looks much closer to a finished image.
RAW processing in Photomator

RAW processing in Lightroom

Zooming in, the gap widens. Lightroom’s file shows visible noise across the background and the shadows of the face, as its luminance noise reduction is set to zero by default, although it does hold on to more fine skin texture and hair detail.
Zoomed in on Lightroom

Photomator delivers a much cleaner file, with smooth backgrounds and polished skin, at the cost of a little texture. This lines up with my denoise test, where Photomator also produced the cleaner result.
Zoomed in on Photomator

For me, Photomator does the better job at RAW processing, giving you a stronger starting point with less work, while Lightroom suits those who prefer a neutral base and want full control over building their own look.
File Management
In my opinion, Lightroom does the best job when it comes to file management overall. Both of them do the basics: star ratings, flags and the ability to create folders for different shoots.

The star rating lives at the bottom of your files, making it easy to select them.
It’s much easier to star-rate an image in Lightroom, as the stars sit below each frame. Photomator lets you right-click and select a rating from a drop-down menu, or for a quicker route, you can press keys 1 through 5 on your keyboard.
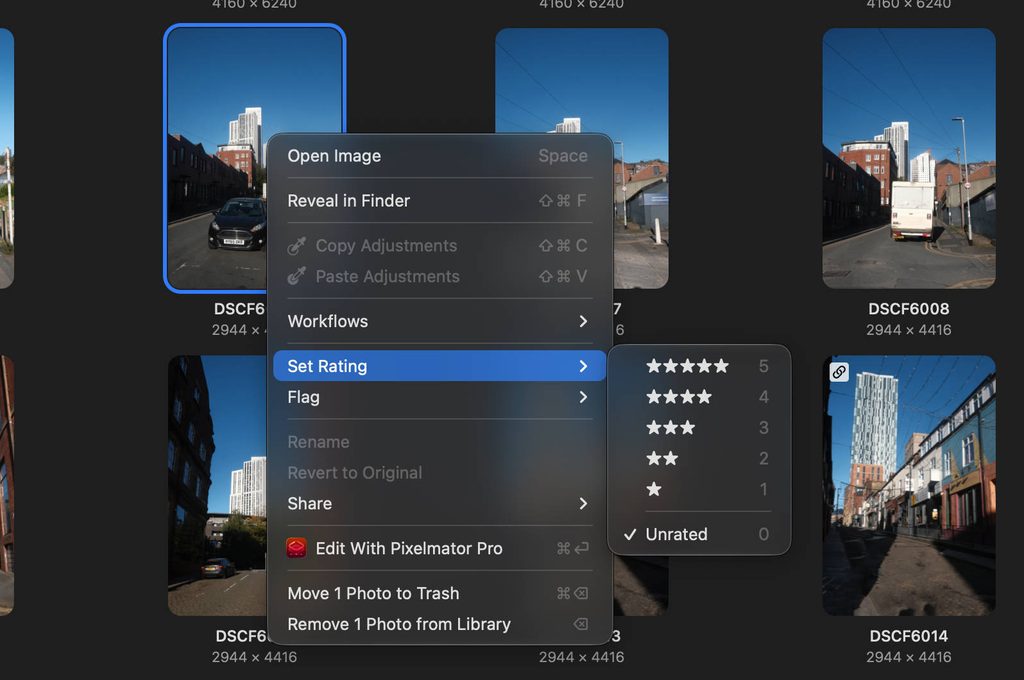
Star rating in Photomator
Lightroom also has the edge with keywords. Select an image or group of images and you can add unique keywords, then sort images by them. There’s smart search too, which lets you locate images simply by describing them in the search bar.
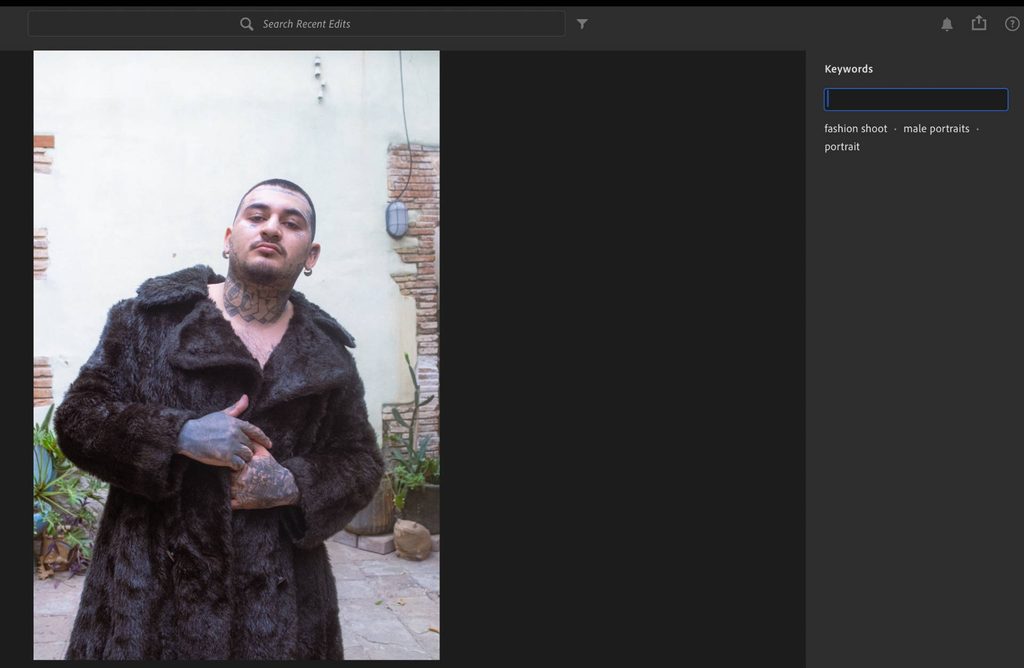
Lightroom keywords
Another advantage of Lightroom is assisted culling, a feature Photomator doesn’t currently offer. It’s good for filtering out misfires, out-of-focus shots and similar frames. However, in my opinion, nothing beats your own eye when it comes to culling.
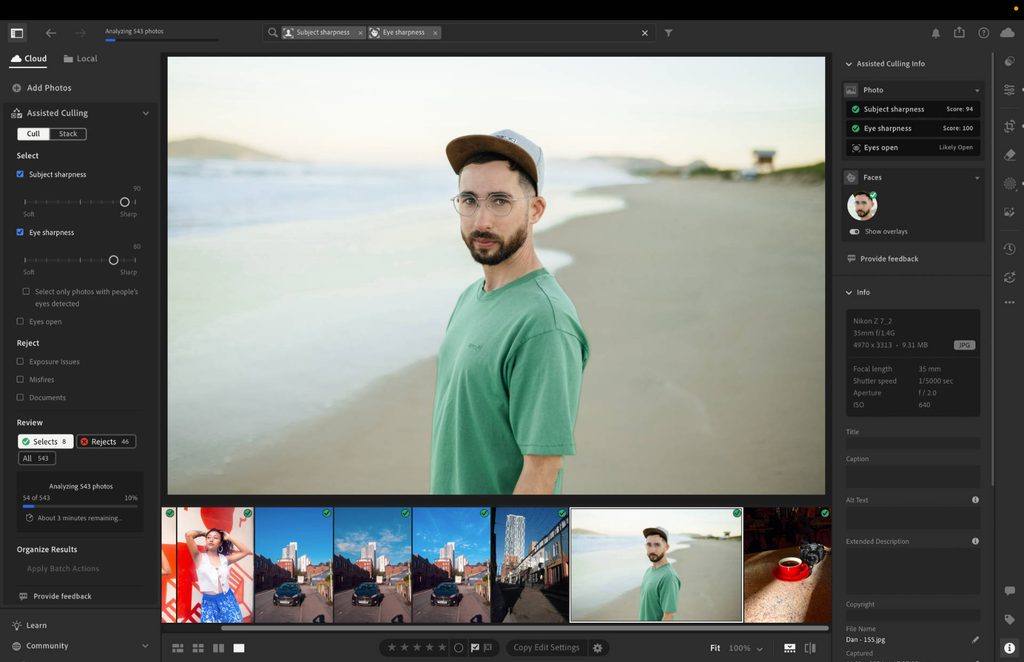
Lightroom culling.
Related: I Tested The Best Photo Culling Software (A Clear Winner in 2026)
Battery & Performance
I ran my battery and performance tests on my M5 MacBook Air, which has 16GB of RAM.
To test battery life, I spent one hour in each app performing a range of editing tasks, including light adjustments, masking and generative AI object removal. I made sure no other programs were running during each session, then recorded how much battery was used.
I also tested export times using a batch of 360 edited photos. These were all Fujifilm X-T3 RAW files, which are around 60MB each.
I should note that my laptop is only seven months old with 100% battery health, so results may differ on older machines.
Lightroom 1hr editing: -15% battery
Lightroom export time: 15 minutes and 23 seconds
Photomator 1hr editing: -19% battery
Photomator export time: 14 minutes and 18 seconds
Overall performance on both platforms is impressive. I did notice some lag in Photomator when quickly skipping through images, and occasionally when zooming in and out, while Lightroom stayed consistently smooth, even during demanding generative AI tasks.
Photomator wins on export speed by about a minute, but Lightroom takes the overall win here thanks to better battery efficiency and a smoother editing experience.
Ease of Use & Design
Lightroom and Photomator take different approaches to design. Lightroom goes for a muted, minimal look, while Photomator feels more vibrant and modern, and I found it easier on the eye. That said, I really enjoyed using both of them for long editing sessions, and each has done a very good job on design.

Photomator masks are at the top of the right-hand menu.
Moving between masks feels a little more fluid in Photomator, as they sit at the top of the right-hand panel. Getting to your masks in Lightroom is still straightforward, as they’re simply tucked further down the panel.
Both apps offer a one-click auto enhance. In my testing, Photomator pushed the exposure a little too high, while Lightroom’s results were more subtle. Either makes a great foundation for an edit, but I wouldn’t treat them as a finished result.
Lightroom auto enhance
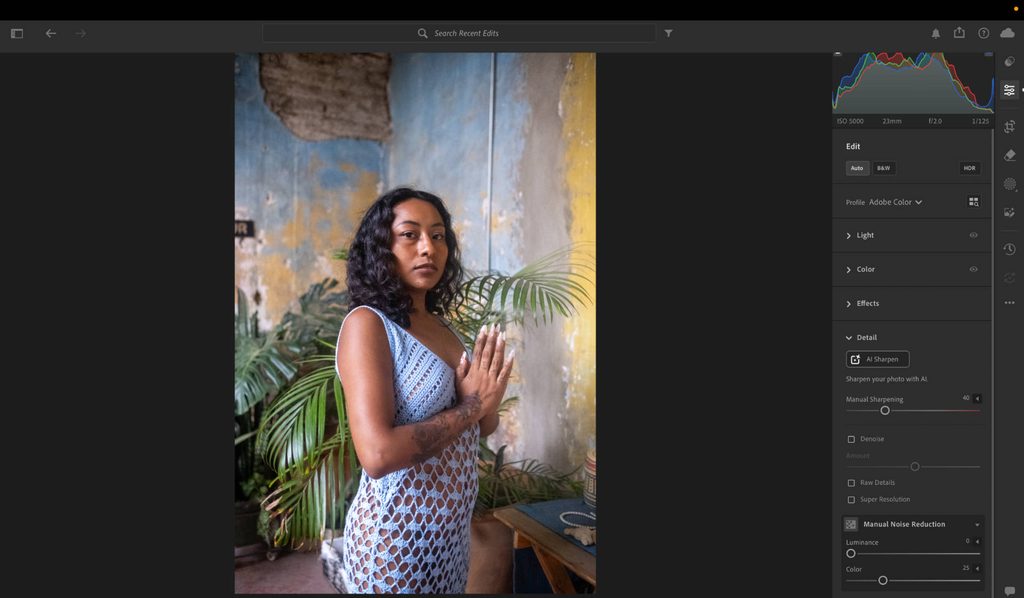
Photomator auto enhance
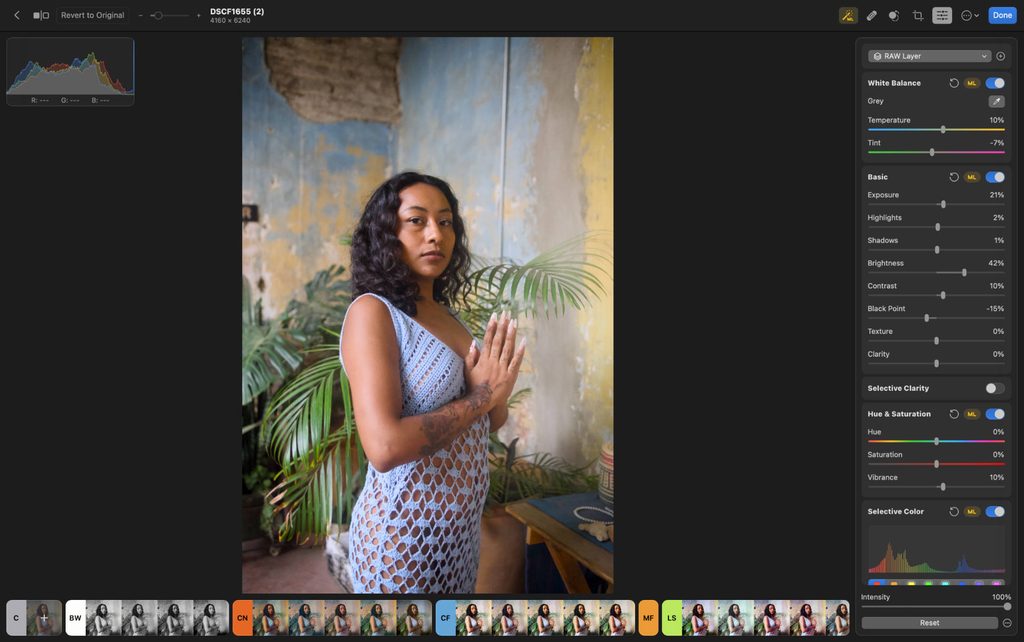
Learning the ropes is easy on both platforms, and even a beginner should take to them like a duck to water.
Related: Best Photo Editing Software for Beginners
My one gripe is a navigation issue in Photomator: once you’ve edited an image, you can’t use your arrow keys to move to the next one. Instead, you have to leave the editor, go back to the file browser and open another image. It only takes a few clicks, but skipping through images with the arrow keys, as you can in Lightroom, is much easier.
Mobile Apps & Syncing
Both Lightroom and Photomator have mobile apps, though only Lightroom is available on Android, as Photomator stays locked into the Apple ecosystem. For the most part, each app mirrors what you’ll find on desktop.
The one stand-out difference is that Photomator lets you edit in landscape orientation, with your image on one side of the screen and your tools on the other. Because nothing overlaps, you get more space and a much clearer view of how each adjustment changes your image.
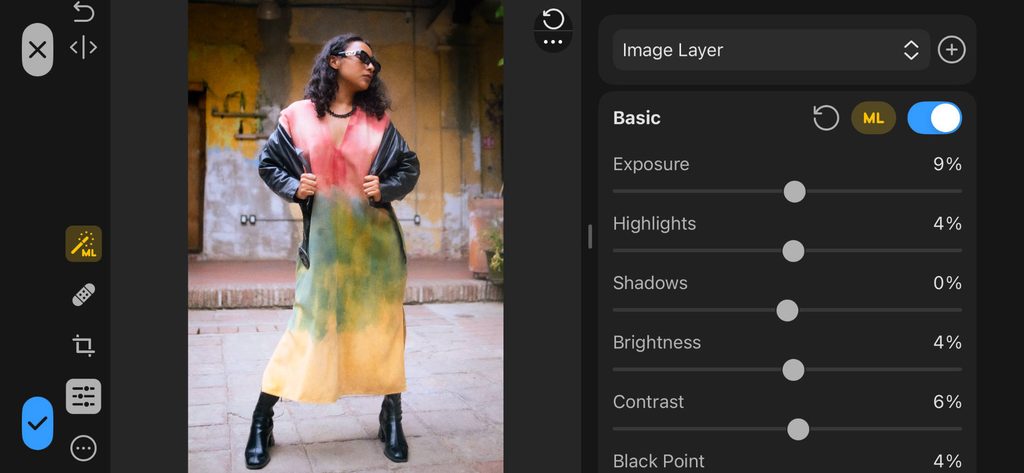
Photomator on my iPhone 13.
Turn your phone sideways in Lightroom and you only see the image, with no access to the editing panel. It’s a small detail, but it gives Photomator the edge for anyone who likes to edit on the go.
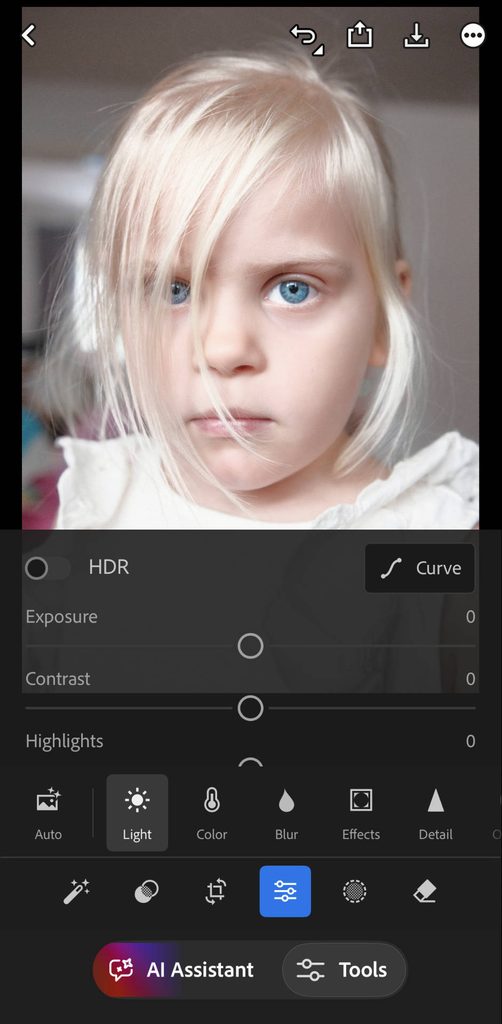
Lightroom on my iPhone 13.
Cloud syncing works well on both. Edits I made on my desktop showed up on my phone, and when I started an edit on my phone, I could pick up exactly where I left off on desktop. Lightroom includes 1TB of cloud storage, while Photomator relies on however much iCloud storage you pay for with Apple.
Either way, if you’re a smartphone photographer or prefer editing on an iPhone or iPad, I think you’ll have a great experience with both apps.
Related: Best Photo Editing Apps for iOS and Android
Who Are They For?
For me, Lightroom is a great all-rounder. It’s an excellent choice if you’re just starting out with photo editing, but it also gives you all the tools you need to grow. As your skills improve and you move toward an experienced, semi-pro or professional level, Lightroom will keep up with you.
Photomator is naturally aimed at those who are fans of Apple products, and I think it’s a very competent editor for beginners through to enthusiasts. Its RAW processing, denoise and mobile editing are all genuine strengths.
However, I wouldn’t call Photomator professional photo editing software. Its masking tools, particularly for people, aren’t as refined as Lightroom’s, and at the time of writing it hasn’t been updated since January 2026. It also wasn’t included in Apple’s Creator Studio subscription, which leaves question marks over its future and makes it harder to rely on as a long-term professional tool.
Pricing
The biggest pricing difference between the two is that Photomator offers a lifetime license: pay once and it’s yours to own forever. Lightroom, on the other hand, is subscription only.
Lightroom (1TB)
- Monthly: $17.99/month, cancel anytime
- Annual, billed monthly: $11.99/month ($143.88/year)
- Annual, prepaid: $119.88/year
- Full refund if you cancel within 14 days on annual plans
Photomator
- Monthly: $7.99
- Annual: $34.99
- Lifetime: $119.99
Photomator’s lifetime license gets the same features as the subscription, so for me it’s the best value here, costing about the same as a single year of Lightroom.
The catch is that Photomator rarely gets updated, while a Lightroom subscription keeps you on the latest tools as Adobe releases them. If you’re happy with what Photomator offers today, the lifetime license is well worth the investment.
Signing Off
If you’re asking which one I’d go for overall, it’s Lightroom. It’s the more refined photo editor, it leaves plenty of room to grow as your skills improve, and with regular updates, it’s built for the long haul.
That said, if you choose Photomator, I still think you’re making a good decision. Both offer free trials, and testing each one on your own images is the best way to know which is right for you.
More reading: Luminar Neo vs Photomator: After Testing Both, My Pick Is Clear